

Testing the fuel pump on the 1994-2005 3.1L V6 Buick Century is pretty easy because the fuel injector rail is equipped with a Schrader valve.
This Schrader valve lets you connect a fuel pressure gauge and accurately check the amount of fuel pressure the pump is producing.
In this tutorial, I'll show you how to test fuel pressure step by step using a fuel pressure gauge. I'll also explain how to use starting fluid to quickly determine if a crank-but-no-start condition is being caused by a lack of fuel pressure.
Contents of this tutorial:
APPLIES TO: This tutorial applies to the following vehicles:
- 3.1L V6 Buick Century: 1994, 1995, 1996, 1997, 1998, 1999, 2000, 2001, 2002, 2003, 2004, 2005.
FUEL PUMP CIRCUIT WIRING DIAGRAMS:
- Fuel Pump Circuit Wiring Diagram (1994-1995 3.1L V6 Buick Century).
- Fuel Pump Circuit Wiring Diagram (1996 3.1L V6 Buick Century).
- Fuel Pump Circuit Wiring Diagram (1997 3.1L V6 Buick Century).
- Fuel Pump Circuit Wiring Diagram (1998-1999 3.1L V6 Buick Century).
- Fuel Pump Circuit Wiring Diagram (2000-2001 3.1L V6 Buick Century).
- Fuel Pump Circuit Wiring Diagram (2002-2005 3.1L V6 Buick Century).
ENGINE NO-START DIAGNOSTICS: Troubleshooting an engine cranks but does not start? this tutorial is complete guide to no-start diagnostics:
Symptoms Of A Bad Fuel Pump
The fuel pump's job is to supply the fuel injectors with the fuel pressure they need to start the engine and keep it running.
When the fuel pump fails completely, the engine won't receive any fuel. When it becomes weak, it may still pump fuel, but not enough to keep the engine running properly.
Depending on how the fuel pump has failed, you'll usually run into one of these two problems:
- Crank-but-no-start condition: The engine cranks normally but doesn't start.
- Engine performance problems: The engine starts and runs, but doesn't run correctly.
A weak fuel pump can cause one or more of the following symptoms:
- Extended cranking: The engine takes longer than normal to start.
- Rough idle: The engine idles rough or may idle inconsistently.
- Backfiring: The engine backfires through the intake manifold under load.
- Starts then stalls: The engine starts but dies a few seconds later.
The good news is that both types of fuel pump problems can be diagnosed with a fuel pressure test.
Where To Buy A Fuel Pressure Test Gauge
You'll need a fuel pressure test gauge with the GM Schrader valve adapter to test the fuel pressure on your 3.1L V6 Buick or Oldsmobile. Here are my recommendations:


Disclosure: As an Amazon Associate, I earn from qualifying purchases. If my tutorials help you, using these links is an easy way to support the site at no extra cost to you. Thank you!
Using A Fuel Pump Pressure Tester To Test The Fuel Pump
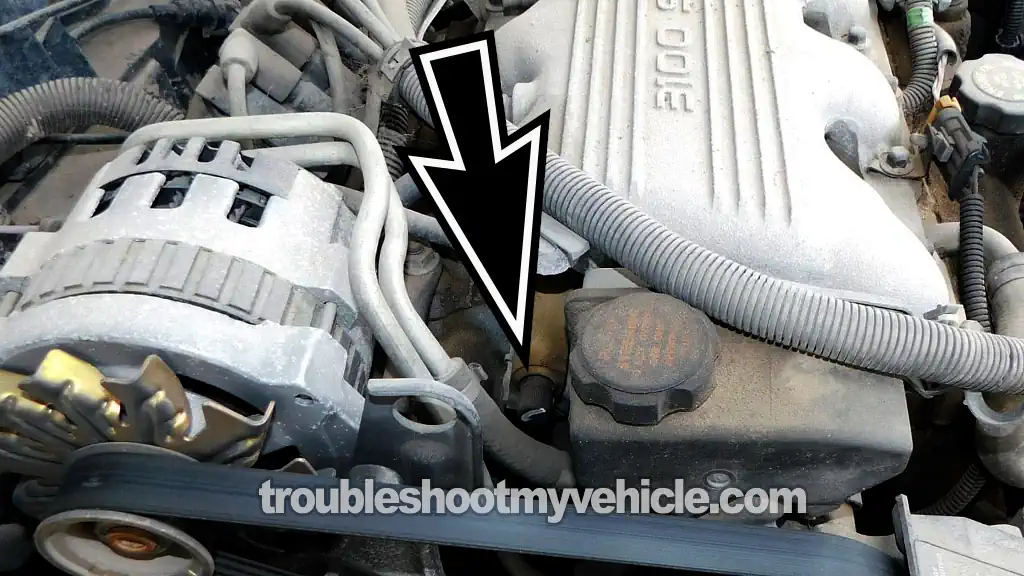
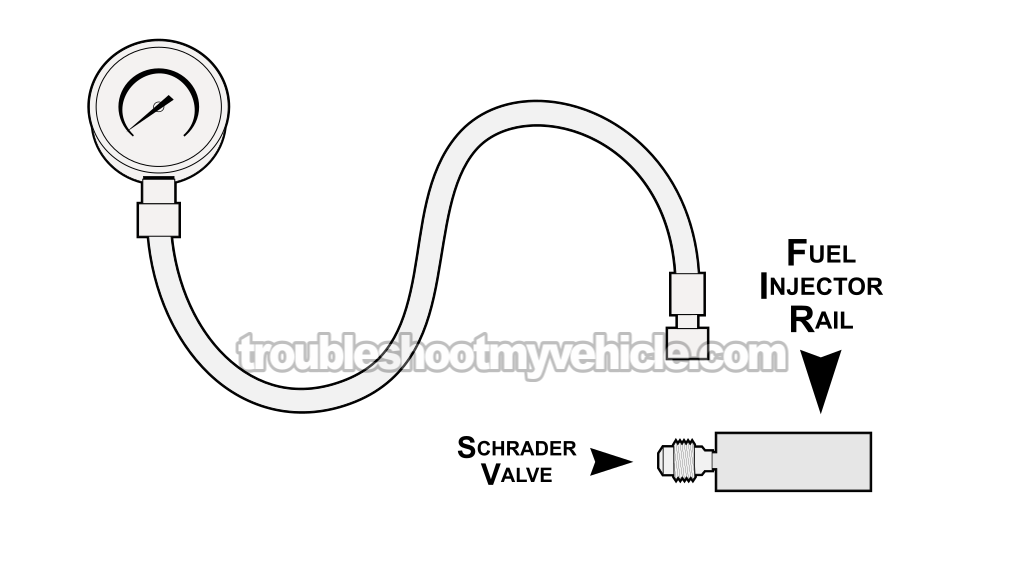
To check fuel pressure, you'll connect a fuel pressure gauge to the Schrader valve on the fuel injector rail (photo 1 of 2 shows its location).
You'll need the correct GM Schrader valve adapter to connect the pressure gauge to the fuel rail.
If your fuel pressure tester didn't come with the proper adapter, take a look at this section: Where To Buy A Fuel Pressure Test Gauge.
The correct Key On Engine Off (KOEO) fuel pressure specification depends on your Buick Century's model year:
- 1994-1999: 41-47 PSI with the Key ON Engine Off (KOEO).
- 2000-2005: 52-59 PSI with the Key ON Engine Off (KOEO).
Let's get started:
- 1
Remove the plastic dust cap from the Schrader valve.
- 2
Connect your fuel pressure tester to the Schrader valve.
- 3
If your Buick Century is a 1994-1996 model, you can energize the fuel pump through the fuel pump prime connector (located next to the fuel pump relay). This lets you check fuel pressure without cranking the engine.
If your vehicle doesn't have a fuel pump prime connector (1997-2005 models), continue to the next step. - 4
Disconnect the ignition control module from its three electrical connectors. This disables spark and keeps the engine from starting while you perform the fuel pressure test.
- 5
Have your helper crank the engine for a few seconds while you observe the fuel pressure gauge.
Once your helper stops cranking, leave the ignition key in the ON position and note the fuel pressure reading. - 6
The fuel pressure gauge should register the specified Key On Engine Off (KOEO) fuel pressure.
Before disconnecting the fuel pressure tester, inspect all connections for fuel leaks. If you find any leaks, resolve them before continuing.
Let's take a look at your fuel pressure test results:
CASE 1: The fuel pressure gauge registered 0 PSI. This confirms that no fuel is reaching the fuel injectors, which explains the crank-but-no-start condition.
In most cases, this means the fuel pump has failed and needs to be replaced.
CASE 2: The fuel pressure gauge registered the specified fuel pressure. This confirms that the fuel pump is operating correctly and supplying adequate fuel pressure to the injectors.
You can rule out the fuel pump as the cause of the no-start problem and continue troubleshooting other possible causes.
CASE 3: The fuel pressure gauge registered a pressure below the specified value. This tells you the fuel pump isn't producing enough pressure to supply the fuel injectors correctly.
Although the fuel pump is still running, it's weak and should be replaced.
Using Starting Fluid
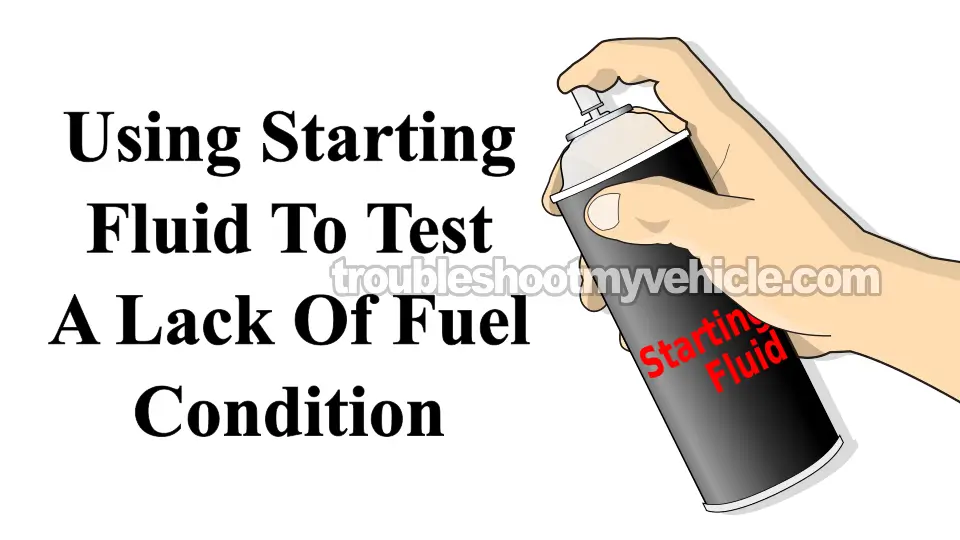
Whenever I'm diagnosing a crank-but-no-start condition, one of the first things I check is whether the engine is getting fuel. The quickest way to do that is with a starting fluid test.
I've used this test countless times over the years because it quickly tells me whether I should focus on the fuel system or continue looking elsewhere.
Although a starting fluid test doesn't replace a fuel pressure test, it can quickly point your diagnosis in the right direction.
IMPORTANT: Before performing the starting fluid test, make sure all six spark plug wires are producing spark. If you haven't already verified spark, use a dedicated spark tester to test each spark plug wire first. Otherwise, the results of the starting fluid test won't be accurate.
OK, these are the test steps:
- 1
Remove the intake air duct from the throttle body.
You don't have to completely remove it, since you'll have to reconnect it in one of the next steps. - 2
Open the throttle manually, and spray starting fluid down the bore.
When you have sprayed a good squirt of starting fluid, quickly reconnect the air duct to the throttle body (you don't have to tighten the hose clamp).
Reconnecting the intake air duct is a very important safety precaution in case you get a back-fire thru' the intake manifold. - 3
Crank the engine once the intake air duct is back on the throttle body.
- 4
You'll get one of two results with this test:
1.) The engine will start momentarily and after a few seconds will die or.
2.) The engine will only crank but not start at all.
OK, let's analyze your test result:
CASE 1: The engine started and ran for a few seconds. This result confirms that the engine isn't starting due to a lack of fuel.
I suggest that your next step be to test the fuel pump's fuel pressure with a test gauge. For this test go to: Using A Fuel Pump Pressure Tester To Test The Fuel Pump.
CASE 2: The engine did not start, not even momentarily. This result generally tells you a lack of fuel IS NOT the reason your car is not starting.
Now, remember what I said about this test not being very accurate? Well, I suggest you do one more test and this is to test the fuel pump's fuel pressure with a test gauge. For this test go to: Using A Fuel Pump Pressure Tester To Test The Fuel Pump.
More 3.1L V6 Buick Century Tutorials
You can find a complete list of 3.1L V6 Buick Century tutorials and wiring diagrams in this index:
Here's a sample of the tutorials you'll find in the index:
- How To Test The TPS With A Multimeter (1997-2005 3.1L V6 Buick Century).
- Common Causes Of Spark Plug Failure (1994-2005 3.1L V6 Buick Century).
- How To Test For A Blown Head Gasket (1994-2005 3.1L V6 Buick Century).
- How To Test Engine Compression (1994-2005 3.1L V6 Buick Century).

If this info saved the day, buy me a beer!
