")
In this tutorial, I'm gonna show you how to test fuel pressure using a fuel pressure gauge on the 2004–2010 4.0L Ford Explorer and Mercury Mountaineer.
Some —but not all— 2004 and 2005 models have a Schrader valve for easy gauge connection. All others require a T-fitting installed between the fuel line and the fuel rail's inlet pipe.
No matter which setup your Explorer or Mountaineer has, I'll walk you through what you need, how to hook it up, how to read the pressure, and how to make sense of the results.
Whether your 4.0L Ford V6 won't start at all or just feels underpowered, this test will help you quickly figure out if zero or low fuel pressure is to blame.
I'll also show you how to run a simple Starting Fluid test —no tools needed— to help confirm whether the no-start is fuel-related.
Contents of this tutorial:
- Symptoms Of A Bad Fuel Pump.
- Where To Buy A Fuel Pressure Gauge.
- TEST 1: Checking Fuel Pressure With A Gauge.
- TEST 2: Starting Fluid Test.
- Checking The Fuel Pump Inertia Switch.
- Disconnecting The Fuel Line From The Fuel Injector Rail.
- Fuel Pressure Release Procedure.
- More Fuel Pump Troubleshooting Help.
- More 4.0L V6 Ford Explorer And Mercury Mountaineer Tutorials.
IMPORTANT: Gasoline is extremely flammable! Take all necessary safety precautions, be alert, be careful. Starting fluid and gasoline can ignite very easily.
APPLIES TO: This tutorial applies to the following vehicles:
- 4.0L V6 Ford Explorer: 2004, 2005, 2006, 2007, 2008, 2009, 2010.
- 4.0L V6 Mercury Mountaineer: 2004, 2005, 2006, 2007, 2008, 2009, 2010.
MORE FUEL PUMP DIAGNOSTIC RESOURCES: You can find fuel pump circuit wiring diagrams, related fuel pump tests, and the inertia switch tests in this section:
Symptoms Of A Bad Fuel Pump
When a fuel pump fails, it usually fails in one of two ways:
- The pump stops working altogether: The engine cranks but never starts, because fuel isn't reaching the injectors at all.
- The pump is still running —but not at full strength: The engine might start and idle, but it runs rough, especially when you hit the gas or when you stick it in Drive and start driving.
Here are some symptoms that often point to a weak or completely failed fuel pump:
- No-start condition: You turn the key, the starter engages, but the engine never catches —just cranks and cranks.
- Starts up, then dies: The engine may start, but stalls out a few seconds later.
- Stalls under load: It idles fine, but the moment you press the accelerator or put it in gear, it sputters and cuts off.
- Lack of power when driving: Acceleration feels weak, or the engine bogs down (like when climbing hills or merging onto the highway).
- Popping or backfiring: If not enough fuel reaches the injectors, the air/fuel mixture leans out and you might hear popping from under the hood.
- Lean condition trouble codes: If you've got a check engine light and see codes like P0171 or P0174, a failing fuel pump might be the reason the air/fuel mixture is running lean.
NOTE: If after checking fuel pressure and it's where it should be, and the engine still won't start, the issue lies somewhere else —this other guide will help you further diagnose the problem:
If you don't have a fuel pressure gauge yet, no worries —in the next section, I'll show you where to get one without spending a fortune...
Where To Buy A Fuel Pressure Gauge
NOTE: Before picking up a gauge, there's one thing you need to know: some 2004-2005 Explorer and Mountaineer models do have a fuel pressure test port (a Schrader valve) on the fuel rail.
All of the later 2006 to 2010 —don't have one. So if your particular 2004-2010 Explorer/Mountaineer doesn't have one, you'll need a test kit that includes a T-fitting to tap into the fuel line.
The fuel pressure gauge test kits I've linked to below cover both the Schrader valve and non-Schrader valve vehicles. They're affordable, dependable, and come with the fittings you'll need, whether your Explorer has the Schrader valve or not.
With A Schrader Valve On The Fuel Injector Rail:


With No Schrader Valve On The Fuel Injector Rail:

Disclosure: As an Amazon Associate, I earn from qualifying purchases. Buying through these links helps support this site at no extra cost to you. Thanks for your support —it really means a lot!
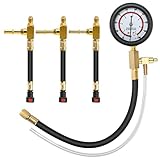
TEST 1: Checking Fuel Pressure With A Gauge
")
")
Ford's official procedure calls for activating the fuel pump using a bidirectional scan tool. If you've got one —awesome! Go ahead and use it to command the pump on and take your pressure reading.
If you don't have a scan tool, no problem. The instructions below walk you through both scenarios —with or without one— so you're covered either way.
Also, whether your engine starts or won't start, the test procedure handles both situations. You'll still be able to get a clear answer about fuel pressure either way.
As I mentioned earlier, if your Explorer (Mountaineer) doesn't have a Schrader valve, you'll need a fuel pressure test kit that includes a T-fitting. This fitting gets installed between the fuel line and the fuel rail's inlet pipe.
One last thing —besides the T-fitting, you'll need a quick disconnect tool to remove the fuel line. For tips on which type to use (plastic vs. Aluminum) and a solid tool recommendation, check out this section: Disconnecting The Fuel Line From The Fuel Injector Rail.
Next, let's look at the fuel pressure specs you'll need to compare your readings against:
NOTE: Before you start this test, double-check the fuel pump inertia switch. If that switch has tripped, it'll cut power to the fuel pump —and that can make it look like the pump is dead, even when it's not. You can follow the full steps here: Checking The Fuel Pump Inertia Switch.
SAFETY FIRST: Always take the necessary safety steps when working with fuel. Work in a well-ventilated area, keep open flames and sparks far away, wear eye protection, and have a fire extinguisher nearby —just in case.
Alright, here's how to check fuel pressure, step by step:
- 1
Release the fuel pressure in the fuel line.
See this section for the procedure: Fuel Pressure Release Procedure. - 2
Connect your fuel pressure gauge.
If your vehicle has a Schrader valve, connect the gauge to it.
If your vehicle doesn't have a Schrader valve, disconnect the fuel line and install the T-fitting (see the image above). Be sure and follow your test kit's instructions to avoid any complications. - 3
Have your helper cycle the key ON and OFF several times —but don't crank the engine.
This will prime the system. Watch closely for leaks.
If everything stays dry, you're good to go.
If you see or smell fuel, stop and fix the leak before continuing.
Scan Tool Pump Activation: Engine starts or doesn't start
- 4
Connect your bidirectional scan tool to the OBD II diagnostic connector.
- 5
Turn the key ON but don't start the engine.
NOTE: The fuel pump activation (with the bidirectional scan tool) is done with the engine OFF. - 6
Enter component tests and activate the fuel pump.
NOTE: Consult your scan tool's user manual for exact steps on how to access the fuel pump activation feature —the process can vary depending on the brand and model. - 7
The fuel pressure gauge should show the fuel pressure within spec.
Key On Engine Off (KOEO) Test (No Scan Tool): Engine doesn't start
- 4
Have your helper crank the engine, then release the key.
NOTE: After cranking, the key should stay in the RUN position. If your helper turns it all the way to OFF, the test won't work —you'll need to do it again. - 5
The fuel pressure gauge should show the fuel pressure within spec.
Key On Engine Off (KOEO) Test (No Scan Tool): Engine starts (but you need KOEO pressure)
- 4
Unplug the ignition coil pack. This keeps the engine from starting so you can measure fuel pressure with the key ON and engine OFF.
- 5
Now have your helper crank the engine and let go of the key.
NOTE: The key should stay in the RUN position after cranking. If your helper switches it off completely, the pump will shut off immediately and you won't get an accurate reading. - 6
The fuel pressure gauge should show the fuel pressure within spec.
Key On Engine Running (KOER) Test (No Scan Tool): Engine starts and stays running
- 4
Have your helper start the engine and let it idle.
- 5
The fuel pressure gauge should show the fuel pressure within spec.
Let's break down what those results actually tell you:
CASE 1: The gauge reads 0 PSI. That means no fuel is getting to the injectors —which explains why the engine won't start.
But don't rush to call the fuel pump bad just yet. We've got to double-check two key things next:
- You've checked the fuel pump inertia switch, but is it getting power? So the next step is to make sure the switch is getting power and sending it to the fuel pump driver module (FPDM) while the engine's cranking —this rules out issues with the fuel pump fuse or fuel pump relay. This guide will help you with this easy check:
- Finally, your next step is to check the fuel pump driver module (FPDM):
CASE 2: Fuel pressure is within spec. That's good —your fuel pump is working like it should.
If the engine still isn't starting, then you've got something else going on —but at least now you can cross the pump off your list. To keep digging into the no-start, head over to this full guide:
TEST 2: Starting Fluid Test
")
When you're dealing with an engine no-start problem, the starting fluid test can give you a quick read as to whether a fuel delivery issue is to blame.
If you've never run this test before, just know that it's not a precise way to confirm a bad fuel pump —but it can definitely tell you if the engine isn't starting due to lack of fuel. From there, you can keep digging into the fuel system.
I've used this test many times in the field as a quick way to narrow down the root cause of the engine no-start. Just keep one thing in mind: before running it, make sure all six cylinders are getting spark. If there's no spark, the test won't give you any useful info.
NOTE: If you haven't checked the inertia switch yet, do so now. If it's been tripped, the fuel pump won't run at all. You can find the steps here: Checking The Fuel Pump Inertia Switch.
Time to get your hands dirty:
- 1
Pull the intake duct off the throttle body. You don't need to remove it completely —just loosen it enough to spray fluid into the intake.
- 2
Manually open the throttle blade and give it a solid spray of starting fluid right into the intake manifold.
- 3
Reconnect the intake duct right after spraying. No need to tighten the clamp for now.
IMPORTANT: Always reattach the duct before cranking as a safety precaution —in case of a backfire through the intake. - 4
Now have your helper crank the engine while you observe what happens.
- 5
Here's what you're looking for:
1.) The engine starts for a moment, then stalls.
2.) The engine just cranks and never fires.
Let's go over what each result means:
CASE 1: It started, then shut off. Since the engine is getting spark —but not fuel, it started with the starting fluid you sprayed into the throttle body bore.
Most of the time, that points to a bad or non-functioning fuel pump. I still recommend confirming it with an actual fuel pressure test: TEST 1: Checking Fuel Pressure With A Gauge.
CASE 2: It didn't start at all. If the engine doesn't fire with starting fluid (and you've confirmed that all spark plug wires are sparking), the issue isn't fuel-related.
That said, this test isn't always 100% conclusive. If in doubt, go ahead and run a fuel pressure test to rule it out for good: TEST 1: Checking Fuel Pressure With A Gauge.
Checking The Fuel Pump Inertia Switch
")
The 2004–2010 4.0L V6 Explorer and Mountaineer come equipped with a fuel pump inertia switch —a simple but important safety device that shuts off fuel pump power in the event of a crash or major jolt.
When this switch is triggered, it cuts off power to the pump completely. The engine may crank all day long, but without fuel reaching the injectors, it's not going to start.
While it's meant to activate only during accidents, I've seen plenty of cases where it tripped after something minor —like hitting a deep pothole or bumping a curb. I've even heard some folks mention it's gotten tripped by slamming the door a little too hard.
That's why I always recommend checking this switch before diving into more time-consuming fuel pump diagnostics.
On these models, you'll find the inertia switch behind the passenger-side kick panel —right under the glove box, near the floorboard. Just pull back the plastic panel to access it.
To reset it, press the large red button on top of the switch until it bottoms out. If the switch has been tripped, you'll hear and feel a distinct click as it resets.
Once it's reset, try starting the engine. If it fires up, you've found the problem —no further testing needed.
If you do need to test the inertia switch, this tutorial will help you with the test:
- Fuel Pump Inertia Switch Tests (1991-2010 4.0L V6 Ford Explorer, Aerostar, And Mercury Mountaineer).
Disconnecting The Fuel Line From The Fuel Injector Rail
If your Explorer or Mountaineer doesn't have a Schrader valve on the fuel rail, you'll need to install a T-fitting to measure fuel pressure —and that means disconnecting the fuel line from the fuel injector rail inlet pipe.
To do this, you'll need a fuel line quick disconnect tool. There are several designs on the market —some made of aluminum, others of plastic— but I recommend using a plastic tool for this job. Why?
Because connecting the fuel line to the T-fitting is a breeze, but disconnecting it again can be a hassle if your disconnect tool doesn't give a little (flex a little).
I'll try to explain it a little further, when the fuel line connects to the T-fitting, the space between the fuel line and the T-fitting is minimal, which complicates inserting the quick disconnect tool between them. So, you'll need a little flexibility in the tool to get the tool seated properly, and plastic tools offer that flex.
Aluminum quick disconnect tools are too stiff, and in my experience, they're impossible to use to disconnect the fuel line from the T-fitting.
I recommend the Lisle 39400 Angled Disconnect Tool Set. It's not the cheapest out there, but the build quality makes the job easier when inserting it into that tight spot. I've also linked a more affordable no-name brand version with good reviews in case you're on a tighter budget. Both will get the job done —and picking one up through the links helps support the site and keeps tutorials like this one free.
- Lisle 39400 Angled Disconnect Tool (Amazon affiliate link).
- AUPREX Disconnect Removal Tool (Amazon affiliate link).
Fuel Pressure Release Procedure
Before connecting the fuel pressure test T-fitting adapter to the injector rail (that doesn't have a Schrader valve), it's important to relieve the pressure in the fuel line first.
Here's the procedure that applies to the Ford Explorer and Mercury Mountaineer:
- Remove the fuel pump fuse:
- 2004–2005: Fuse 39 (in the Battery Junction Box).
- 2006–2010: Fuse 4 (in the Battery Junction Box).
- Crank the engine. If it starts, let it run until it stalls on its own.
- Crank the engine a few more times —until it stops firing completely.
- Wrap a shop towel around the fuel line and disconnect it from the injector rail.
- The towel will help catch any leftover fuel in the line.
- Reinstall the fuel pump fuse once the line is disconnected.
- After completing the pressure test, clear any diagnostic trouble codes that may have set while cranking the engine with the fuel pump disabled.
More Fuel Pump Troubleshooting Help
FUEL PUMP DRIVER MODULE (FPDM) TESTS: On these Fords, the fuel pump doesn't turn on directly by the fuel pump relay. Instead, it's the FPDM that does the heavy lifting —once it gets the "ON" command signal from the PCM. In this tutorial, I'll walk you through how to test the FPDM step-by-step.
- FPDM Basic Operating Theory (2004-2010 4.0L V6 Ford Explorer And Mountaineer).
- Fuel Pump Driver Module Tests (2004-2010 4.0L V6 Ford Explorer And Mercury Mountaineer).
- Bypassing The FPDM Module (2004-2010 4.0L V6 Ford Explorer And Mercury Mountaineer).
FUEL PUMP AMPERAGE DRAW TEST:
FUEL PUMP PRESSURE TESTS:
- How To Test The Fuel Pump (1993-2000 4.0L V6 Ford Explorer, Aerostar, And Mercury Mountaineer).
- How To Test The Fuel Pump (2001-2003 4.0L V6 Ford Explorer And Mercury Mountaineer).
FUEL PUMP INERTIA SWITCH TESTS:
- Fuel Pump Inertia Switch Tests (1991-2010 4.0L V6 Ford Explorer, Aerostar, And Mercury Mountaineer).
- Power To Fuel Pump Check (1991-2010 4.0L V6 Ford Explorer, Aerostar, And Mercury Mountaineer).
ENGINE NO-START DIAGNOSTICS:
FUEL PUMP CIRCUIT DIAGRAMS:
- Fuel Pump Circuit Wiring Diagram (2004 4.0L V6 Ford Explorer And Mercury Mountaineer).
- Fuel Pump Circuit Wiring Diagram (2005 4.0L V6 Ford Explorer And Mercury Mountaineer).
- Fuel Pump Circuit Wiring Diagram (2006-2010 4.0L V6 Ford Explorer And Mercury Mountaineer).
More 4.0L V6 Ford Explorer And Mercury Mountaineer Tutorials
I have written several more 4.0L V6 Explorer/Mountaineer specific test articles. You can find them all here:
The following tutorials are a sample of the articles you'll find in the index:
- How To Test The CKP Sensor (1997-2010 4.0L V6 Ford Explorer And Mercury Mountaineer).
- Fuel Pressure Specifications (1991-2010 4.0L V6 Ford Explorer, Mercury Mountaineer).
- How To Test For A Blown Head Gasket (1991-2010 4.0L V6 Ford Explorer, Aerostar, And Mercury Mountaineer).
- Troubleshooting P0171 And P0174 (1996-2003 4.0L V6 Ford Explorer, Aerostar, And Mercury Mountaineer).

If this info saved the day, buy me a beer!
