")
Testing the engine compression on the 4.2L V6 engine in your Ford E-Series van is a challenge, since removing the spark plugs is not the easiest thing in the world to do.
I'm not saying this to discourage you from performing the engine compression test; after all, it's the go-to test to find out the internal health of the engine.
In this tutorial, I'll explain how to do the compression test and more importantly, how to interpret its results.
You'll be able to find out if you have one or more engine cylinders that are causing a misfire or causing the engine to not start.
Contents of this tutorial:
APPLIES TO: This tutorial applies to the following vehicles:
- 4.2L V6 Ford E150: 1997, 1998, 1999, 2000, 2001, 2002, 2003.
- 4.2L V6 Ford E250: 1997, 1998, 1999, 2000, 2001, 2002, 2003.
F-SERIES PICKUPS: The engine compression test tutorial for the 1997-2003 4.2L V6 Ford F150 and F250 can be found here:
- How To Do An Engine Compression Test (1997-2003 4.2L V6 Ford F150, F250) (at: easyautodiagnostics.com).
Symptoms Of Low Or No Engine Cylinder Compression
It's been my experience, that an engine compression problem will typically cause one of two issues:
- Cylinder misfire: The engine start and runs, but it runs with a rough idle when the engine is idling.
- Engine no-start: The engine cranks but doesn't start.
When an engine compression problem is allowing the engine to start, you're going to see one or more of the following symptoms:
- Check Engine Light: The check engine light will be illuminated on your van's instrument panel.
- Misfire trouble codes: You many see one or more of the following:
- P0300: Random Cylinder Misfire.
- P0301: Cylinder #1 Misfire.
- P0302: Cylinder #2 Misfire.
- P0303: Cylinder #3 Misfire.
- P0304: Cylinder #4 Misfire.
- P0305: Cylinder #5 Misfire.
- P0306: Cylinder #6 Misfire.
- Engine Performance Problems: You many see one or more of the following:
- Engine is not as peppy as it was once.
- Rough idle that goes away as soon as you accelerate the engine.
- Bad gas mileage: The engine has to work harder if one or more cylinders aren't functioning properly.
- Blue smoke: Having blue smoke coming out of the tailpipe is a classic sign of engine compression problems.
- A heavier exhaust smell: A heavier-than-normal exhaust smell coming out of the tailpipe is due to one or more cylinders not being able to properly compress and combust the air/fuel mixture within them.
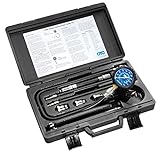
Which Compression Tester Should I Buy?
There are lot of engine compression testers to choose from and many places to buy them. I'm gonna' make some recommendations to you:


Disclosure: As an Amazon Associate, I earn from qualifying purchases. If my tutorials help you, using these links is an easy way to support the site at no extra cost to you. Thank you!
TEST 1: Finding The Dead Cylinders
")
To get the most accurate test result from your compression test, I'm going to recommend that you test all six cylinders.
If you already know which cylinder is 'dead' and only want to test that one, no problem; you don't have to test them all. However, you'll still need to test one or two more to determine if the 'dead' cylinder's compression is less than 15% of the highest compression you obtain from the other two cylinders.
Once you've obtained the results of your test, we're going to interpret those results and if you have one or more cylinders with a low compression value compared to the others, well figure out if they are causing a problem or not in the next section of this tutorial.
If you don't have a compression tester, you can borrow one or buy one from your local auto part store. If you'd like to save a few bucks, check out my recommendations here: Which Compression Tester Should I Buy?
IMPORTANT: If the engine has been running for any length of time, let it cool down completely before removing the spark plugs.
OK, these are the test steps:
- 1
Disable the ignition system by disconnecting the ignition coil pack from its electrical connector.
This will prevent the ignition coil from sparking during the test. - 2
Remove the spark plugs. Remember, the engine can not be hot!
When removing the spark plugs, be careful not to drop any on the floor, or you run the risk of having the spark plug's porcelain insulator crack and then you'll have a misfire on your hands. - 3
Thread the engine compression gauge into the spark plug hole for the number 1 engine cylinder.
NOTE: Hand tighten the compression gauge only! Do not use any type of tool to get it tight. - 4
Have your helper crank the engine till the needle on the compression gauge stops climbing.
- 5
Record the value at which the needle stopped and the number of the engine cylinder on a piece of paper.
- 6
Release the pressure on the gauge and repeat step 4 and 5 one more time.
- 7
Repeat test steps 3 - 5 on the remaining cylinders.
Let's examine your test results:
CASE 1: One or more cylinders had a much lower compression value than the others. Up to a certain range, this could be normal.
To further interpret these test results go to: Interpreting The Compression Test Results.
CASE 2: All six cylinders had almost no compression or 0 PSI compression. This low or zero compression on all cylinders will cause the engine to not start.
Having a compression value close to 0 PSI or 0 PSI is usually due one of the following problems:
- A busted timing chain.
- Blown head gasket.
- The engine threw a rod.
CASE 3: The compression value of all six cylinders was similar and above 120 PSI. This test result lets you know that an engine compression problem is not behind the misfire condition and/or engine no-start problem you're troubleshooting.
Interpreting The Compression Test Results
It's not uncommon to find that some cylinders have a lower compression value than the rest (especially on high mileage engines). Within a certain range, this doesn't cost any engine performance issues.
It's when these low compression values vary more than 15% than the highest, that the engine is going to idle rough or suffer a misfire problem.
You can find out if these low compression values are causing an issue by doing some easy math and in this test section, I'll explain how to do that.
The rule of thumb is that the lowest compression value can not vary more than 15% of the highest value (that you wrote down in TEST 1). If any value is lower by more than 15%, then that engine cylinder is going to misfire. This misfire will cause your Ford van's 4.2L V6 engine to idle rough.
How do you figure this out? You can find out by using my online low compression calculator here: Online Low Engine Compression Calculator (at: easyautodiagnostics.com) or by calculating this 15% difference manually.
To understand how to figure out this 15% thing manually, I'll use the following compression test results:
- Cylinder #1 175 PSI.
- Cylinder #2 165 PSI.
- Cylinder #3 170 PSI.
- Cylinder #4 120 PSI.
- Cylinder #5 170 PSI.
- Cylinder #6 170 PSI.
The next step is to do the following math:
- Multiply .15 (15%) by the highest value: 175 x 0.15. This gives us 26.25, but we'll round it out to 26.
- Next, we subtract 26 from 175: 175 - 26 = 144.
- So now we know that the lowest possible compression value is: 144 PSI.
This means that cylinder #4, which has a compression value of 120 PSI, is the one causing the misfire because it's below the 144 PSI minimum.
Once we've found the 'dead' cylinder, the next step is to find out what's causing the low compression value. For this step, go to: TEST 2: Wet Engine Compression Test.
TEST 2: Wet Engine Compression Test
")
If you've reached a section, that's one has confirmed you've got one or more cylinders with low compression. This low compression is the result of one of two things:
- The affected cylinder's piston rings are severely worn or damaged.
- The affected cylinder's intake/exhaust valves are severely worn or damaged.
Thankfully, a wet compression test can help us identify the source of low compression -be it the piston rings or the intake/exhaust valves- without the need to disassemble the engine for a visual inspection.
The wet compression test simply involves adding about two tablespoons of oil to the low compression cylinder and then checking its compression again.
If the cylinder's compression increases after adding engine oil and retesting, the low compression issue is caused by worn piston rings. Now, if the compression doesn't improve, the problem is due to the affected cylinder's intake/exhaust valves.
These are the test steps:
- 1
Add 1 or 2 tablespoon of engine oil in the cylinder you need to retest. I suggest using a small and long funnel so that the oil will reach the inside of the cylinder.
- 2
Install the compression gauge on the cylinder you just added oil to.
- 3
Have your helper crank the engine till the needle stops climbing on the compression gauge.
- 4
You'll see one of two results:
1.) The needle will climb higher than the previous compression number you recorded for this specific cylinder.
2.) The needle will not move at all or stay at the same number you recorded earlier.
What ever value your compression tester reads, write it down again. - 5
Repeat steps 1 thru' 4 on any other cylinder you need to check.
Let's examine your test results:
CASE 1: The compression value of the cylinder you added oil to increased. This test result tells you that the low or near 0 PSI compression value is due to worn out piston rings of that specific cylinder.
CASE 2: The compression value of the cylinder you added oil to DID NOT increase. This test result confirms that the cylinder head valves of that cylinder are worn-out or damaged.
More 4.2L Ford E150 And E250 Test Tutorials
If this tutorial was helpful, be sure and take a look at all of the 4.2L V6 E150 and E250 diagnostic tutorials in this index:
Here's a sample of the tutorials you'll find there:
- How To Test The Throttle Position Sensor (1997-2000 4.2L V6 Ford E150, E250).
- How To Test The Fuel Pump (1997-2000 4.2L V6 Ford E150, E250).
- How To Test The CKP Sensor With A Multimeter (1997-2003 4.2L V6 Ford E150, E250).
- How To Test For A Blown Head Gasket (1997-2003 4.2L V6 Ford E150, E250).

If this info saved the day, buy me a beer!

