")
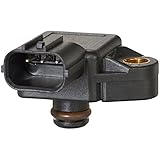
The manifold absolute pressure (MAP) sensor on the 2003–2004 3.0L V6 Honda Accord can be easily tested using just a basic multimeter and a vacuum pump.
In this tutorial, I'll show you how to check the MAP sensor's output signal and confirm it's getting both 5 Volt power and Ground —so you're not left guessing whether it's good or bad. And if it is bad, you'll know that replacing it will actually fix the problem.
All three tests are laid out step-by-step, so whether you're working in the shop or wrenching in the driveway, this guide will help you confidently track down a MAP sensor issue behind a P0107 or P0108 code.
Contents of this tutorial:
- Symptoms Of A Bad MAP Sensor.
- Should I Just Replace The MAP Sensor?
- Where To Buy The MAP Sensor And Save.
- TEST 1: Checking The MAP Sensor Signal.
- TEST 2: Making Sure The MAP Sensor Is Getting Power.
- TEST 3: Making Sure The MAP Sensor Is Getting Ground.
- More 3.0L V6 Honda Accord Diagnostic Tutorials.
APPLIES TO: This tutorial applies to the following vehicles:
- 3.0L V6 Honda Accord: 2003, 2004.
RELATED MAP SENSOR TESTS:
- How To Test The MAP Sensor (1998-1999 3.0L V6 Honda Accord).
- How To Test The MAP Sensor (2000-2002 3.0L V6 Honda Accord).
- How To Test The MAP Sensor (2005-2007 3.0L V6 Honda Accord).
Symptoms Of A Bad MAP Sensor
Your 2003–2004 3.0L V6 Honda Accord uses a speed-density fuel injection system, and the MAP sensor sits right at the heart of it. Along with engine RPM and intake air temperature, the MAP sensor helps the PCM figure out how much air is entering the engine —so it can inject the right amount of fuel.
When the MAP sensor starts sending bad data, engine performance goes downhill fast.
You'll usually see the check engine light shining nice and bright, along with one of these diagnostic trouble codes (DTCs):
- P0107 –MAP Sensor Voltage Too Low.
- P0108 –MAP Sensor Voltage Too High.
If you need a more in-depth explanation of what those codes mean, check out these guides I put together:
- P0107 MAP Sensor Code Explained (1998–2007 3.0L V6 Honda Accord).
- P0108 MAP Sensor Code Explained (1998–2007 3.0L V6 Honda Accord).
Now aside from the DTCs, you might also see one or more of these issues:
- Throttle response feels delayed or jerky.
- Idle hunts or feels unstable.
- Gas mileage takes a noticeable hit.
- Takes longer to start —seems you gotta crank the engine forever.
- Black smoke out the tailpipe (engine may be running rich).
- Lack of power under load.
Just keep in mind —those symptoms don't automatically mean the MAP sensor is toast. Weak fuel pressure or low engine compression can cause similar issues. That's why it's a good idea to test the MAP sensor.
Up next, let's discuss if you should just replace the MAP sensor or test it.
Should I Just Replace The MAP Sensor?
Generally, seeing a P0107 or P0108 lighting up the check engine light usually means the MAP sensor is toast on your 2003–2004 Accord.
Most folks (and shops too) usually just toss a new one in and call it done. And the truth is, that works more often than not.
What makes this strategy appealing is the fact that the MAP sensor's super easy to replace, usually won't break the bank, and takes less five minutes to replace. If you don't feel like testing —or don't have the gear on hand— replacing it first is a reasonable plan.
If this is the plan, here are two solid options that are a good fit and are from trusted brands I've used myself many times:
- Walker Products 225-1053 MAP Sensor (Amazon affiliate link).
- Spectra Premium MP118 MAP Sensor (Amazon affiliate link).
Purchases through those links help support this site —at no extra cost to you. Thanks for helping keep it free and growing.
Now, if you're the type who wants to know before replacing parts (that's the way I roll too), all you need is a digital multimeter and a small hand vacuum pump.
Let's get started with the first step: TEST 1: Checking The MAP Sensor Signal.
Where To Buy The MAP Sensor And Save
When you're ready to replace the MAP sensor, the links below can help you compare options from known and trusted automotive brands I've used myself:

Disclosure: As an Amazon Associate, I earn from qualifying purchases. If my tutorials help you, using these links is an easy way to support the site at no extra cost to you. Thank you!
Not sure if the MAP sensor fits your particular vehicle? Don't worry, once you get to the site they'll make sure it fits by asking you the specifics of your particular vehicle. If it doesn't fit, they'll find you the right MAP sensor.
TEST 1: Checking The MAP Sensor Signal
For our first test, we're gonna check if the MAP sensor's output voltage reacts correctly when vacuum is applied and released. That voltage should drop smoothly as vacuum increases and rise again as you release it.
If that signal stays flat, spikes randomly, or does nothing at all, then this confirms that code P0107 or P0108 is telling the truth.
The wire we need to tap into (to check the MAP output signal) is the GRN/RED one —green with red stripe. You'll hook up your multimeter to it, then apply vacuum using a hand pump. Doesn't get much simpler than that.
If you don't have a multimeter or a vacuum pump, these are the ones I recommend —they're reliable, easy to use, and affordable for any DIYer or pro tech:
- Tekpower TP8268 AC/DC Auto/Manual Range Digital Multimeter (Amazon affiliate link).
- HTOMT 2 In 1 Vacuum Pump Test Set (Amazon affiliate link).
Using those links helps support this site. It won't cost you more, but it helps me keep putting out guides like this one. I appreciate it!
NOTE: You can still do the test without a vacuum pump. You can use your mouth and a clean vacuum hose to apply vacuum to the MAP sensor.
One more thing: The MAP sensor must remain connected to its 3-wire connector to check the MAP signal. You'll need to tap into the signal wire either using a back probe (on the connector) or a wire piercing probe (on the wire). You can learn more about this tool (and where to buy it) here: Wire Piercing Probe.
OK, let's check your MAP sensor's voltage response:
- 1
Remove the MAP sensor from the intake so you can easily access the vacuum fitting.
- 2
Connect a handheld vacuum pump to the sensor's vacuum port using a short length of hose.
Be sure to keep the electrical connector plugged in during the entire test. - 3
Set your multimeter to Volts DC —20 Volts range is the ideal range for this check.
- 4
Attach the black multimeter test lead to the battery's negative (-) post.
- 5
Probe the GRN/RED wire with your red multimeter lead.
NOTE: You'll want to back-probe the connector or use a wire-piercing probe here. - 6
Turn the ignition key to ON —don't start the engine.
- 7
You should see a voltage reading between 3.8 and 4.5 Volts with zero vacuum applied.
- 8
Apply vacuum slowly using your pump or a clean vacuum hose by mouth.
- 9
Voltage should drop smoothly —ideally down to about 1.1 Volts when full vacuum is reached.
- 10
Release the vacuum and let the sensor return to normal pressure.
- 11
Watch for the voltage to rise again —back to the original 3.8–4.5 Volt range.
- 12
Repeat the cycle a few times to confirm consistent readings up and down.
Now that you've run the MAP sensor voltage test —let's make sense of what those numbers actually mean:
CASE 1: Voltage dropped when you pulled vacuum, then rose back up when released. That's a textbook response. Your MAP sensor is working just the way the PCM expects it to —nothing wrong here.
Still seeing a P0107 or P0108 even after passing this test? Then we're probably looking at a different problem entirely. This guide will walk you through what to check next:
CASE 2: Voltage didn't budge —you applied vacuum, released it, and the reading never changed. That's often the result of a dead MAP sensor.
But we still need to confirm it's getting power. Continue to: TEST 2: Verifying The MAP Sensor Is Getting Power.
CASE 3: Multimeter reads a flat 0 Volts on the signal wire. That could mean one of two things —either the sensor's fried, or it's not even getting voltage or Ground to begin with.
Next step: we need to confirm both power and Ground are present. Start here: TEST 2: Making Sure The MAP Sensor Is Getting Power.
TEST 2: Making Sure The MAP Sensor Is Getting Power
If the MAP sensor didn't respond during TEST 1, the next thing to check is whether it's even getting the 5 Volts it needs from the PCM. No power means no signal —simple as that.
That 5 Volt reference is what allows the sensor to measure vacuum and send an usable signal. On your 2003–2004 Honda Accord, this voltage comes in through the YEL/RED (yellow with red stripe) wire at the MAP connector.
Here's how to check it with your multimeter:
- 1
Disconnect the MAP sensor from its electrical connector.
- 2
Put your multimeter in DC Volts mode. Set it to 20V.
- 3
Turn the key ON —but engine OFF to power up the circuits.
- 4
Ground the black multimeter test lead directly on the battery's negative (-) post.
- 5
Carefully touch the red multimeter test lead to the YEL/RED wire's female terminal at the connector.
- 6
Your multimeter should report 4.5 to 5.0 Volts on its display.
Now, let's interpret those results:
CASE 1: You're getting between 4.5 and 5 Volts. That means the PCM is sending the MAP sensor the voltage it needs.
Next step? Let's make sure it also has a good Ground, which is delivered by the GRN/WHT wire. Move on to: TEST 3: Making Sure The MAP Sensor Is Getting Ground.
CASE 2: No voltage showing. Double-check your multimeter setup and repeat the test.
Still zero? Then MAP sensor itself is OK, the problem's somewhere in the power circuit —could be a broken wire, a short, or even something wrong inside the PCM.
Either way, replacing the sensor won't fix it. You're next step is to inspect and test the 5 Volt wire for continuity between the connector and the PCM.
TEST 3: Making Sure The MAP Sensor Is Getting Ground
So far you've confirmed:
- The MAP signal doesn't react to changes in vacuum (TEST 1).
- The MAP sensor has power (TEST 2).
But there's one more piece needed for the sensor to work —a solid Ground. Without it, the sensor can't send a signal, and the PCM is left in the dark.
On your 2003–2004 Accord, the Ground for the MAP sensor comes through the GRN/WHT wire at the connector.
IMPORTANT: This Ground is delivered by the PCM (internally). Never apply direct battery voltage to this wire —doing so will fry the PCM. The method below keeps everything safe.
Here's how to test the Ground safely:
- 1
Leave the MAP sensor unplugged.
- 2
Set your multimeter to DC Volts mode.
- 3
Turn the key to the ON position but don't start the engine.
- 4
Connect the red multimeter test lead to the battery's positive (+) terminal.
- 5
Use the black multimeter test lead to probe the GRN/WHT wire's female terminal at the connector.
- 6
You should see between 10 to 12 Volts on your multimeter.
Let's break down what that reading means:
CASE 1: Multimeter shows 10–12 Volts. That's what we want. It confirms the Ground path is solid and the PCM is doing its part.
So now you've confirmed all the essentials:
- TEST 1: Signal didn't respond to vacuum —MAP is not outputting correctly.
- TEST 2: The sensor is getting 5 Volts.
- TEST 3: Ground circuit checks out.
Since we've done our due diligence, we can conclude the MAP sensor itself is cooked —replace it.
Here are two replacements, from known automotive brands I trust and use:
- Walker Products 225-1053 MAP Sensor (Amazon affiliate link).
- Spectra Premium MP118 MAP Sensor (Amazon affiliate link).
Your support through those links helps keep the site free and growing —thanks again!
CASE 2: No reading at all. Double-check your connections and retest.
Still nothing? Then the Ground wire isn't doing its job. Your next step is to troubleshoot this missing Ground and check the continuity of the GRN/WHT wire from the MAP connector to the PCM.
Fixing the cause of this missing Ground will get the MAP sensor working again.
More 3.0L V6 Honda Accord Diagnostic Tutorials
Whether you're chasing down a check engine light or just want to understand your Accord a little better, this index is a great place to start. It's full of real-world how-to guides written with both DIYers and experienced techs in mind.
Here's a quick peek at some of the step-by-step tutorials you'll find there:
- How To Troubleshoot A No Start (1998-2007 3.0L V6 Honda Accord).
- How To Test For A Broken Timing Belt (1998-2007 3.0L V6 Honda Accord).
- How To Test a Misfire Condition and Misfire Codes (3.0L V6 Honda Accord).
- How To Test Engine Compression (1998-2007 3.0L V6 Honda Accord).

If this info saved the day, buy me a beer!
