This tutorial will explain how to test the 1998-2001 4.0L Mercury Mountaineer's alternator with a multimeter.
You'll easily and quickly find out if the alternator in your Mercury Mountaineer is good or bad.
NOTE: You can find the 4.0L Ford Aerostar, Explorer, Ranger, and Mazda B4000 alternator test tutorials here:
- How To Test The Alternator (1991-2000 4.0L Ford Explorer And Aerostar).
- How To Test The Alternator (1996-2001 4.0L Ford Ranger And Mazda B4000) (at: easyautodiagnostics.com).
Contents of this tutorial:
APPLIES TO: This tutorial applies to the following vehicles:
- 4.0L V6 Mercury Mountaineer: 1998, 1999, 2000, 2001.
Important Testing Tips
The following tips will help you accomplish the tests in this tutorial:
TIP 1: The battery must be fully charged to get an accurate test result from your alternator test.
TIP 2: You can use a digital multimeter or an analog multimeter.
TIP 3: Take all necessary safety precautions. Be alert and think safety all of the time since you'll be working around a running engine.
Symptoms Of A Bad Alternator
When the alternator fails, it'll stop charging the battery. And when this happens, you will see the battery malfunction indicator light illuminated on your 4.0L Mercury Mountaineer's instrument panel.
Besides the battery light shining nice and bright on the instrument panel, you'll see one or more of the following symptoms:
- The engine only start with a jump start. After a few minutes of run time, it dies.
- The engine starts fine if you charge the battery. After your initial trip, the battery needs a jump-start to crank and start the engine.
- Dim headlight glow dim.
TEST 1: Checking Alternator Voltage Output With A Multimeter

Your first test will check the battery voltage with the engine running.
What you're looking for is for battery voltage to be between 13.5 to 14.5 Volts DC.
If the voltage is within this range, you can conclude that the alternator is functioning correctly and is charging the battery.
If the voltage is at 12.5 Volts DC or less, then you've got an alternator that isn't charging the battery.
NOTE: If you don't have a multimeter or need to upgrade yours, check out my recommendation here: Buying A Digital Multimeter For Automotive Diagnostic Testing (at: easyautodiagnostics.com).
IMPORTANT: You must perform this test with a fully charged battery.
Let's get testing:
- 1
Place your multimeter in Volts DC mode.
- 2
Start the engine and let it idle.
- 3
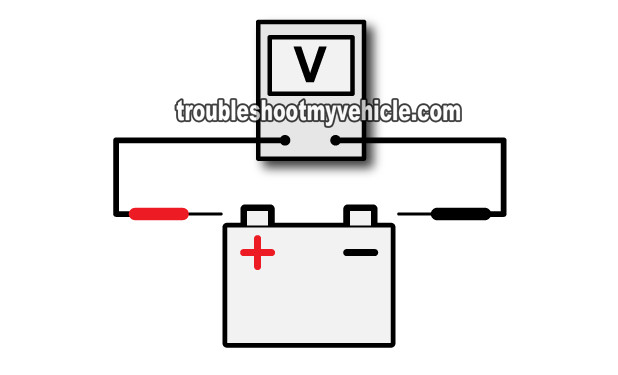
Probe the battery terminals with your multimeter test leads.
The red multimeter test lead to battery positive (+) post. The black multimeter test lead to the battery negative (-) post. - 4
You should see 13.5 to 14.5 Volts on your multimeter. If you don't, don't worry about this just yet, continue to the next step.
- 5
Place a load on the battery. You can do this by turning on the headlights, the A/C or heater on high, the windshield wipers, the radio, the rear window defroster, etc.
- 6
You'll see one of two things:
1.) The voltage will decrease slightly and then stabilize around 13.5 to 14.5 Volts DC when something comes on.
2.) The voltage reading will start to decrease till it reaches 10 Volts DC and your vehicle may stall.
Let's analyze your test results:
CASE 1: The voltage stayed at 13.5 to 14.5 Volts thru' out the whole test. This is the correct and expected test result and it tells you the alternator is charging the battery.
No further testing is required.
CASE 2: The voltage is at 12.5 Volts or less and decreased as you turned on all accessories. This test result confirms the alternator is not charging the battery.
It's starting to look like the alternator is bad. To make sure, go to: TEST 2: Testing The Continuity Of The Alternator's Battery Circuit.
CASE 3: The voltage started at 13.5 Volts to 14.5 Volts, but decreased to 12.5 Volts or less as you turned on all accessories. Generally, this test result indicates the alternator is bad.
It's starting to look like the alternator is bad. To make sure, go to: TEST 2: Testing The Continuity Of The Alternator's Battery Circuit.
