")
In this tutorial, I'm going to show you how to test the rear O2 sensor for Bank 1 Sensor 2 —the one responsible for the P0141 HO2S 12 Circuit Malfunction trouble code that lights up the check-engine light on your 2001-2004 3.0L V6 Ford Escape or Mazda Tribute.
You'll run three simple tests using nothing more than a digital multimeter:
- Check that the rear O2 sensor is getting power.
- Make sure it's receiving its heater activation signal.
- Measure the heater's internal resistance to see if the element itself is burned out.
With just these three quick checks, you'll know for sure if the Bank 1 Sensor 2 O2 sensor is fried and needs replacement —no expensive diagnostic tools required.
And if you'd rather skip the testing, I'll also give you a few tips to help you decide whether replacing the sensor outright makes more sense.
Contents of this tutorial:
- Should I Just Replace the Sensor Without Testing It?
- Circuit Descriptions Of The Downstream Oxygen Sensor.
- Where To Buy The Oxygen Sensor And Save.
- TEST 1: Verifying The Heater Element Is Getting Power.
- TEST 2: Verifying The Heater Element Is Getting Ground.
- TEST 3: Testing The Heater Element's Resistance.
- More 3.0L V6 Ford Escape Diagnostic Tutorials.
APPLIES TO: This tutorial applies to the following vehicles:
- 3.0L V6 Ford Escape: 2001, 2002, 2003, 2004.
- 3.0L V6 Mazda Tribute: 2001, 2002, 2003, 2004.
HO2S 12 CIRCUIT WIRING DIAGRAM:
OTHER 02 HEATER DIAGNOSTIC TESTS:
- P0135 -O2 Sensor Bank 1 Sensor 1 Heater Tests (2001-2004 3.0L V6 Ford Escape).
- P0155 -O2 Sensor Bank 2 Sensor 1 Heater Tests (2001-2004 3.0L Ford Escape).
- P0161 -O2 Sensor Bank 2 Sensor 2 Heater Tests (2001-2004 3.0L V6 Ford Escape).
Should I Just Replace the Sensor Without Testing It?
I think the most common go-to strategy for dealing with a P0141 O2 Sensor Heater Circuit Malfunction code is to simply replace the sensor right off the bat. And honestly, most of the time, it does fix the problem —especially if the O2 sensor's heater element is burned out.
This replace-first approach makes sense to a lot of folks for two main reasons:
- They don't have a multimeter, so they can't test the sensor.
- It's cheaper than taking it to a shop. So even if replacing the sensor doesn't solve the issue, they see it as part of their own diagnostic process —and they've still saved a good bit of money by not paying a diagnostic fee or labor charge.
So if your plan is to swap out the sensor right away, no problem —that's a perfectly valid strategy. I want to recommend two aftermarket O2 sensors from brands I've trusted throughout my automotive repair career:
- NTK NGK 22500 Oxygen Sensor (Amazon affiliate link).
- Motorcraft- DY1047 Sensor (Amazon affiliate link).
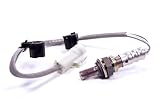
NOTE: The two sensors above are direct fit sensors and they have the plastic attachment points on their wiring to keep them from making contact with the exhaust pipe or CV axle.
But first, before you actually remove and install the new sensor, there are two very important things you need to check:
- Wiring damage:
- Check if the sensor's wires have melted against the exhaust pipe and are shorted together.
- See if the insulation's rubbed through on a sharp edge, the copper strands of the wire are exposed.
- Connector issues: Look for corrosion, loose terminals, or broken connector that can keep the heater from getting power and its activation signal.
I do want to make the case for testing the sensor. After all, this tutorial is about checking the O2 sensor heater circuit. Why test first?
- You only need a multimeter —no scan tool, no fancy gear.
- The tests are quick and simple —all we have to is confirm the sensor has power, confirm it's getting the heater activation signal from the PCM, and measure the heater's internal resistance against spec.
- Easy access —the rear O2 sensor is pretty easy to reach.
- You'll find step-by-step instructions —your test results will quickly tell whether the Bank 1 Sensor 2 O2 sensor is good or toast.
Where To Buy The Oxygen Sensor And Save
The replacement O2 sensor should have the plastic attachment points to keep the sensor's wiring from touching the exhaust pipe or the CV axle. The two sensors below that I'm recommending come equipped with these two attachment points (the Motorcraft DY1047 sensor is the factory original equipment sensor):
 18%
18% 22%
22%

Disclosure: As an Amazon Associate, I earn from qualifying purchases. If my tutorials help you, using these links is an easy way to support the site at no extra cost to you. Thank you!
NOTE: If you're not sure if the above O2 sensor fit your particular 3.0L V6 Escape (3.0L V6 Mazda Tribute) don't worry. Once you get to the site, they'll make sure the sensor is the right one, if not, they'll find you the right one.
TEST 1: Verifying The Heater Element Is Getting Power
")
To get our Bank 1 Sensor 2 O2 sensor diagnostic started, we're going to make sure that the heater element is actually getting power (10 to 12 Volts).
This power (called VPWR) is delivered to terminal 1 of the O2 sensor connector through the light blue with orange stripe (LT BLU/ORG) wire.
VPWR power is present at terminal 1 whenever the key is in the RUN or START position. For our test, we'll check for this voltage with the key ON (but engine OFF) position.
NOTE: This VPWR circuit is protected by Fuse 5 (15 Amp), located inside the Battery Junction Box in the engine compartment.
CAUTION: Make sure the engine is completely cold engine to avoid getting burned from a hot O2 sensor or exhaust manifold! Be careful and take all necessary safety precautions!
IMPORTANT: This test is done on the engine wiring harness connector which has female terminals.
TERMINAL ID: The O2 sensor connector (the one that belongs to the engine wiring harness) on your Ford Escape or Mazda Tribute has one large index tab and two small index tabs. The location of the small tabs may differ from the illustration shown in this tutorial. Always use the large index tab as your reference point when making your multimeter connections and tests.
OK, let's begin.
- 1
Disconnect the downstream O2 sensor from its engine wiring harness connector.
- 2
Turn the key ON but don't start the engine.
- 3
Set your multimeter to Volts DC mode.
- 4
Ground the black multimeter test lead directly on the battery negative (-) terminal.
You may need to use a long jumper wire to extend the reach of your multimeter test lead. - 5
Probe female terminal 1 with the red multimeter test lead.
NOTE: Make sure that terminal 1 connects to the LT BLU/ORG wire of the connector. - 6
Your multimeter should register 10 to 12 Volts DC.
Let's take a look at your test results:
CASE 1: Terminal 1 has 10 to 12 Volts present with the key in the RUN position. This is the correct and expected test result.
Now that we've confirmed the O2 sensor's heater element is getting VPWR power, the next step is to make sure it's receiving the HO2S HEATER activation signal at terminal 2. For this test, go to: TEST 2: Verifying The Heater Element Is Getting Ground.
CASE 2: Terminal 1 does not have 10 to 12 Volts present with the key in the RUN position. Double-check your test connections and make sure terminal 1 connects to the LT BLU/ORG wire.
If you still don't see 10 to 12 Volts at terminal 1, this rules out the O2 sensor itself as the cause of the P0141 trouble code —without power, the heater can't function.
Your next step is to check that fuse 5 in the Battery Junction Box isn't blown. If it is, replace it and retest. Once power is restored to this circuit, the O2 sensor heater should work again and the P0141 DTC should clear.
TEST 2: Verifying The Heater Element Is Getting Ground
So far, you've confirmed that the heater element is receiving 10–12 Volts DC from the VPWR circuit in TEST 1.
Now we'll move on to TEST 2, where we'll check that the PCM (Powertrain Control Module) is actually activating the heater element.
The PCM does this by providing a Ground path for the heater circuit. This HO2S HEATER activation signal is delivered to terminal 2 of the O2 sensor connector through the white with black stripe (WHT/BLK) wire.
When the PCM grounds the WHT/BLK wire, the heater circuit completes and the heater element turns ON.
The PCM provides this HO2S HEATER activation signal only with the key in the RUN or START position. For our test, we're going to check it with the key in the RUN position, but with the engine OFF.
We'll perform a simple multimeter voltage test to confirm that the PCM is indeed Grounding this circuit.
CAUTION: The HEATER Ground is provided internally by your Escape or Tribute's PCM, so be careful not to connect this circuit to battery 12 Volts or you'll deep-fry the PCM. The multimeter voltage test I'm outlining below is a safe way to check for this PCM-supplied Ground.
NOTE: The H2OS HEATER circuit test takes place on the engine wiring harness connector (which has female terminals) and NOT on the connector that belongs to the O2 sensor itself.
These are the test steps:
- 1
Turn the key ON but don't start the engine.
- 2
Set your multimeter to Volts DC mode.
- 3
Connect the red multimeter test lead directly on the battery positive (+) terminal.
You may need to use a long jumper wire to extend the reach of your multimeter test lead. - 4
Gently probe the female terminal 2 with the black multimeter test lead.
NOTE: Confirm that terminal 2 connects to the WHT/BLK wire of the connector. - 5
The multimeter should register 10 to 12 Volts DC.
Let's see what your test result is telling us:
CASE 1: HO2S HEATER Ground is present at terminal 2. Awesome! This is the correct result and confirms the PCM can activate the heater.
For our final diagnostic test, we're going to check the resistance of the O2 sensor's heater element itself. For this test, head over to: TEST 3: Testing The Heater Element's Resistance.
CASE 2: HO2S HEATER Ground is not present at terminal 2. Double-check your test connections and make sure terminal 2 connects to the WHT/BLK wire on the connector.
If your multimeter still doesn't show a HO2S HEATER Ground signal at terminal 2, you can rule out the O2 sensor itself as the cause of the P0141 trouble code —without this activation signal, the heater can't function.
Your next step is to track down why the activation signal is missing and restore it to the circuit. Once the PCM can activate the O2 sensor's heater, the P0141 code should clear.
TEST 3: Testing The Heater Element's Resistance
")
If you've reached this point, your tests have confirmed the following:
- You've got a P0141 DTC lighting up the check engine light.
- The rear O2 sensor (Bank 1 Sensor 2) is getting VPWR power (TEST 1).
- The PCM is providing the HO2S HEATER activation signal (TEST 2).
For our final test, we're going to check the internal resistance of the heater element to see if it's within spec.
If the heater element's resistance measures between 3 - 30 Ω, the heater circuit is OK and the element itself isn't burned out. Anything outside that range indicates a bad heater (and the reason the P0141 code illuminated the check engine light).
You'll make your test connections directly on the O2 sensor's connector terminals —these are the round male terminals on the sensor's connector.
NOTE: The resistance specification of the O2 sensor's heater element is at room temperature, but whatever ambient temperature it is in your location is fine. If the engine has been running for any length of time, be sure and let both the engine and the exhaust pipe cool down completely before checking the heater's element resistance.
OK, this is what you need to do:
- 1
Locate terminals 3 and 4 of the connector that connects directly to the downstream O2 sensor.
NOTE: This test is done on the connector coming out of the O2 sensor itself. This connector has round male terminals. - 2
Set your multimeter to Ohms mode.
- 3
With the multimeter test leads, probe male terminals 3 and 4 of the O2 sensor connector.
- 4
If all is OK, you should see about 3 to 30 Ωs on your multimeter.
If the heater element is fried, your multimeter will show an open (usually indicated by the letters OL) or a number over 10 K Ωs.
Let's take a look at your test results:
CASE 1: The resistance of the O2 sensor's heater element is within specification. This test result confirms the heater element is OK.
If you have a P0141 trouble code that won't go away, you can conclude the sensor itself isn't causing the code. At this point, you've confirmed the heater element is getting power, receiving its activation signal, and is within spec. Whatever's triggering the P0141 code isn't present right now.
CASE 2: The resistance of the O2 sensor's heater element is NOT within specification. This confirms the heater element is toast.
If you've confirmed the following, you can conclude the O2 sensor is bad and needs to be replaced:
- You have a P0141 trouble code illuminating the check engine light.
- The O2 sensor's heater element is receiving VPWR power (TEST 1).
- The O2 sensor's heater element is receiving HO2S HEATER Ground (TEST 2).
- In this test section, you've confirmed the heater element is not within specification.
Whenever you're ready to replace the rear O2 sensor, the following two are from automotive brands I have been using for years and don't hesitate to recommend:
- NTK NGK 22500 Oxygen Sensor (Amazon affiliate link).
- Motorcraft- DY1047 Sensor (Amazon affiliate link).
NOTE: The two sensors above are direct fit sensors and they have the plastic attachment points on their wiring to keep them from making contact with the exhaust pipe or CV axle.
More 3.0L V6 Ford Escape Diagnostic Tutorials
You can find a complete list of 3.0L V6 Ford Escape tutorials in this index:
Here's a small sample of the tutorials you'll find in the index:
- How To Test The Cooling Fan Motors (2001-2004 3.0L V6 Ford Escape - Mazda Tribute).
- How To Test The Throttle Position Sensor (2001-2007 3.0L V6 Ford Escape).
- How To Test The MAF Sensor (2001-2007 Ford 3.0L V6 Ford Escape, Mercury Mariner).
- How To Test The Fuel Pump (2001-2004 3.0L V6 Ford Escape).

If this info saved the day, buy me a beer!
