")
In this tutorial, I'm going to walk you through exactly how to test the fuel pump, step by step on the 2001–2007 3.3L V6 Chrysler or Dodge minivan.
Even though these minivans don't come equipped with a fuel pressure test port (Schrader valve), it's still easy to check fuel pressure with the right adapter.
If you don't have one, I'll show you exactly where you can buy one. I'm also gonna explain how to do a Starting Fluid Test, to see if a lack of fuel (as in a bad fuel pump) is causing the engine to not start.
Contents of this tutorial:
- Symptoms Of A Bad Fuel Pump.
- Where To Buy A Fuel Pressure Test Gauge.
- Fuel Pressure Specifications.
- TEST 1: Checking Fuel Pressure With A Fuel Pressure Gauge.
- TEST 2: Using Starting Fluid To Diagnose A No-Start Condition.
- Checking The Fuel Pump Fuse.
- More 3.3L V6 Chrysler, Dodge, And Plymouth Minivan Tutorials.
APPLIES TO: This tutorial applies to the following vehicles:
- 3.3L V6 Chrysler Town & Country: 2001, 2002, 2003, 2004, 2005, 2006, 2007.
- 3.3L V6 Chrysler Voyager: 2000, 2001, 2002, 2003.
- 3.3L V6 Dodge Caravan: 2001, 2002, 2003, 2004, 2005, 2006, 2007.
- 3.3L V6 Dodge Grand Caravan: 2001, 2002, 2003, 2004, 2005, 2006, 2007.
FUEL PUMP TEST TUTORIALS:
- How To Test The Fuel Pump (1992-1993 3.3L V6 Chrysler, Dodge, And Plymouth Minivan).
- How To Test The Fuel Pump (1994-1995 3.3L V6 Chrysler, Dodge, And Plymouth Minivan).
- How To Test The Fuel Pump (1996-1999 3.3L V6 Chrysler, Dodge, And Plymouth Minivan).
- How To Test The Fuel Pump (2000 3.3L V6 Chrysler, Dodge, And Plymouth Minivan).
Symptoms Of A Bad Fuel Pump
The fuel pump's job is to deliver fuel from the tank to the engine at the correct pressure. When it starts to fail, it can cause a range of issues.
The two most common are:
- Complete Failure: Engine won't start.
- When the fuel pump completely fails, the engine won't receive any fuel, resulting in a no-start condition. You'll hear the starter engage and turn the engine over, but the engine won't fire up.
- Partial Failure: Engine stalls or lacks power.
- A partially failing fuel pump can still deliver some fuel, but not enough for proper engine operation. This can lead to the engine starting but then stalling, especially under load.
"Under Load": This refers to situations where the engine requires more power, such as: Accelerating from a stop, driving uphill, carrying heavy loads, or simply turning the air conditioning on.
In these scenarios, a weak fuel pump can't keep up with the increased fuel demand, leading to performance issues.
Other symptoms to watch for:
- Rough idle: The engine may run unevenly or shake while idling.
- Extended Cranking Time: The engine takes longer to start due to insufficient fuel pressure.
- Lack of power when accelerating: The vehicle feels sluggish and doesn't respond well to you stepping on the gas pedal.
- Engine backfires through the intake manifold: A lean fuel mixture can cause backfiring during acceleration.
- Check engine light with code P0171: This code indicates a lean fuel mixture, often due to inadequate fuel delivery.
If you're experiencing any of these symptoms, it's essential to test the fuel pump to determine if it's functioning correctly. In the next section, we'll walk you through how to do just that.
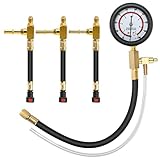
Where To Buy A Fuel Pressure Test Gauge
The 2001–2007 3.3L V6 Chrysler or Dodge minivans don't have a Schrader valve on the fuel rail like the older models did. So you can't just screw in a fuel pressure gauge and go.
But that doesn't mean you're out of options. You can still check fuel pressure —you'll just need to do it inline, using a special adapter called a T Fitting Hair Pin Adapter.
This adapter connects right between the fuel injector rail and the fuel inlet line. Once it's installed, you can hook up your fuel pressure gauge and see exactly what kind of pressure the pump is delivering.
These are the fuel pressure test kits that come with the T-Fitting adapter:

Disclosure: As an Amazon Associate, I earn from qualifying purchases. If my tutorials help you, using these links is an easy way to support the site at no extra cost to you. Thank you!
Fuel Pressure Specifications
| 2001-2007 3.3L V6 Fuel Pressure Spec | ||
|---|---|---|
| Year | KOEO | KOER |
| 2001-2004 | 53-63 PSI | Not Given |
| 2005-2007 | 58 ±5 PSI | Not Given |
- KOEO = Key On Engine Off.
- KOER = Key On Engine Running.
TEST 1: Checking Fuel Pressure With A Fuel Pressure Gauge
")
")
To run a proper fuel pressure test, you'll need to connect a fuel pressure gauge to the fuel line using the T Fitting Hair Pin Adapter I mentioned earlier.
Once that's hooked up, you'll need to power up the fuel pump so the gauge can show you what kind of pressure you're getting.
If you've got a scan tool with "bidirectional control" (where you can activate the fuel pump via the scan tool), you can use that to activate the fuel pump to check its pressure output.
If you don't have one, no problem, you don't need one and in this test section, I'll walk you through how to power up the pump without a scan tool, by bypassing the fuel pump relay with a jumper wire.
This fuel pump relay by-pass method is quick, simple, and works every time —as long as you follow the steps carefully.
IMPORTANT: When using a jumper wire, make sure it's no thicker than the relay's male terminals. If it's too fat, it can spread or permanently damage the female terminals inside the fuse and relay box. Use a clean, snug-fitting wire and take your time —you don't want to cause a new problem while trying to fix the old one.
These are the test steps:
- 1
Place a shop towel under the fuel supply line (where it connects to the fuel injector rail) to catch any spilled fuel.
NOTE: This is a safety step you don't want to skip. - 2
Disconnect the fuel supply line from the fuel injector rail line.
- 3
Connect the fuel pressure gauge T-fitting adapter to the fuel injector rail line.
Make sure the connection is tight and fully seated —you don't want any leaks here. - 4
Connect the fuel supply line to the other end of the T-fitting.
Make sure the connection is tight and fully seated —you also don't want any leaks here. - 5
Connect the fuel pressure gauge to the T-fitting.
- 6
Remove the fuel pump relay from the under-hood fuse box. Refer to image 2 of 2 to make sure you've got the right relay.
- 7
Insert a jumper wire between female terminals 30 and 87 of the relay socket.
This bypasses the relay and powers the fuel pump directly.
Terminal 87 has 12 Volts all the time, terminal 30 connects to the fuel pump.
NOTE: Only jumper those two terminals —don't connect to any others. Refer to image 2 of 2 to double-check your jumper placement. - 8
You should see indicated fuel pressure specification for you specific model year minivan (see: Fuel Pressure Specifications).
Let's break down what your fuel pressure test result means:
CASE 1: The gauge reads the correct pressure specification. This result tells you your fuel pump is doing its job.
Fuel delivery is solid, so if the engine isn't starting, the problem lies somewhere else.
If you're troubleshooting and engine performance issue, it's not caused by the fuel pump.
CASE 2: The pressure is way below spec. You're dealing with a weak or failing fuel pump. Time to start planning for a replacement.
CASE 3: You're getting no pressure at all (0 PSI). You're dealing with a completely failed fuel pump. Time to start planning for a replacement.
TEST 2: Using Starting Fluid To Diagnose A No-Start Condition
")
This is always my go-to test when I'm dealing with a no-start condition. It's quick, easy, and gives me a solid clue about whether the issue is fuel-related or something else entirely.
Now, I want to emphasize —this test isn't 100% accurate. But it'll definitely point you in the right direction.
If the engine responds (as in it starts and runs for a few seconds) to starting fluid, you're most likely dealing with a fuel delivery problem. If it doesn't, then you've probably got a spark or compression issue to chase down.
IMPORTANT: The accuracy of this test depends on all six spark plug wires firing spark. So before you begin this test (if you haven't already), confirm you've got all six spark plug wires sparking.
These are the test steps:
- 1
Disconnect the intake air duct from the throttle body.
You don't need to pull the whole thing off —just loosen the clamp enough so you can lift the hose off the throttle body. We'll put it right back on in the next step. - 2
Spray carb cleaner or starting fluid directly into the throttle body bore.
Use a quick burst —about one or two seconds. - 1
Then immediately slip the air duct back onto the throttle body.
No need to tighten the clamp —just make sure it's seated well enough for the engine to pull air through it. - 3
Have your assistant crank the engine the second that intake hose is back on.
- 4
Watch what the engine does:
It'll either start up for a second and then die, or it'll just crank with no signs of life.
Let's interpret your test result:
CASE 1: Engine starts, then dies. This tells you the fuel system isn't delivering fuel to start the engine.
You're dealing with a fuel delivery issue that more than likely is being caused by the fuel pump. Your next step is to check fuel pressure: TEST 1: Checking Fuel Pressure With A Fuel Pressure Gauge.
CASE 2: Engine just cranks, no-start. If nothing happens at all —not even a sputter— you can rule out a fuel delivery problem.
Whatever is causing the engine to not start, isn't fuel system related.
Checking The Fuel Pump Fuse
")
If your pressure gauge never moved during the test, then we need to verify whether power is actually reaching the fuel pump circuit.
The fuel pump gets its power through terminal 30 of the fuel pump relay socket. This terminal is hot at all times —meaning it should show 12 Volts whether the ignition key is on or off.
That constant voltage is fed from fuse #17 (20 amp) in the underhood fuse and relay box (Integrated Power Module).
To confirm power, grab a test light or multimeter and check terminal 30. If you see no voltage there, pull fuse #17 and give it a look. If it's blown, swap it out and repeat the fuel pressure test to see if the pump kicks on.
It's important to know that a blown fuse is often more than just a random failure. A worn out fuel pump can still run —but when its internal resistance increases, it pulls more amperage than the fuse is rated for. Eventually, that fuse gives out.
If replacing the fuse temporarily brings the pump back to life, but it blows again, the pump's done. Even if the engine still runs for a bit.
And if you've got voltage at terminal 30, the fuse looks good, and the fuel pressure is still sitting at zero? No doubt about it —the pump is getting power but not delivering fuel. It's time for a new one.
More 3.3L V6 Chrysler, Dodge, And Plymouth Minivan Tutorials
You can find a complete list of 3.3L V6 Chrysler, Dodge, and Plymouth minivan tutorials in this index:
Here's a small sample of the tutorials you'll find in the index:
- P0171 Diagnostics (1996-2010 3.3L V6 Chrysler, Dodge, And Plymouth Minivan).
- P0420 Diagnostics -Catalytic Converter Tests (1996-2010 3.3L V6 Chrysler, Dodge And Plymouth Minivan).
- How To Check For Vacuum Leaks: Carb Cleaner Spray (1991-2010 3.9L V6 Chrysler, Dodge, And Plymouth Minivan).
- How To Test For A Blown Head Gasket (1991-2010 3.3L V6 Chrysler, Dodge, And Plymouth Minivan).

If this info saved the day, buy me a beer!
