An engine compression test is fast becoming a key test in diagnosing a hard to troubleshoot misfire condition.
In this tutorial, you'll learn how to do the engine compression test and, more importantly, how to interpret the results of the test on your Jeep 4.0L Wrangler, 4.0L Cherokee, or 4.0L Grand Cherokee.
Contents of this tutorial:
ES ![]() You can find this tutorial in Spanish here: Cómo Probar La Compresión Del Motor (4.0L Jeep) (at: autotecnico-online.com).
You can find this tutorial in Spanish here: Cómo Probar La Compresión Del Motor (4.0L Jeep) (at: autotecnico-online.com).
APPLIES TO: This tutorial applies to the following vehicles:
- 4.0L Jeep Cherokee: 1987, 1988, 1989, 1990, 1991, 1992, 1993, 1994, 1995, 1996, 1997, 1998, 1999, 2000, 2001.
- 4.0L Jeep Comanche: 1987, 1988, 1989, 1990, 1991, 1992.
- 4.0L Jeep Grand Cherokee: 1993, 1994, 1995, 1996, 1997, 1998, 1999, 2000, 2001, 2002, 2003, 2004.
- 4.0L Jeep Wagoneer: 1987, 1988, 1989, 1990.
- 4.0L Jeep Wrangler: 1991, 1992, 1993, 1994, 1995, 1996, 1997, 1998, 1999, 2000, 2001, 2002, 2003, 2004, 2005, 2006.
Important Tips
To successfully accomplish the tests in this article, here are some important tips:
TIP 1: Be alert and take all necessary safety precautions, since you'll be working around a cranking engine.
TIP 2: If the engine has been running for any length of time, let it cool down completely before removing the spark plugs.
TIP 3: Once you install the compression tester, hand tighten it only. Do not use any type of tool to tighten it.
TIP 4: If you're trying to solve a misfire condition (codes: P0300, P0301, P0302, P0303, P0304, P0305, P0306) or a rough idle condition, I recommend that you test for spark first.
Which Compression Tester Should I Buy?
There are lot of engine compression testers to choose from and many places to buy them. I'm gonna' make three recommendations to you:
Disclosure: As an Amazon Associate, I earn from qualifying purchases. If my tutorials help you, using these links is an easy way to support the site at no extra cost to you. Thank you!
TEST 1: Dry Engine Compression Test

As you may already know, each cylinder in the engine of your 4.0L Jeep Cherokee (or Grand Cherokee, Wrangler) needs spark, air, and fuel to run. If any one of these components of the combustion process are missing in any of the six engine cylinders, the engine is gonna' run rough or suffer a misfire condition.
But what often gets overlooked, is the mechanical condition of the cylinder, when diagnosing a rough idle, misfire condition. This is where the following engine compression test comes in handy.
These are the test steps:
- 1
Disable the fuel system by removing the ASD Relay or disconnecting all 6 fuel injectors from their electrical connector.
- 2
Disable the ignition system. It's important that the ignition system not create and deliver spark to the spark plug wires.
You can disable the ignition system by disconnecting the ignition coil (distributor type ignition system). - 3
Disconnect the spark plug wires from the spark plugs. Label them before unplugging them from the spark plugs.
NOTE: This step only applies to ignition distributor systems. - 4
Remove all 6 spark plugs.
Be careful and don't to drop any of them, since dropping them can brake the ceramic insulator and then you'll have a misfire on your hands. - 5
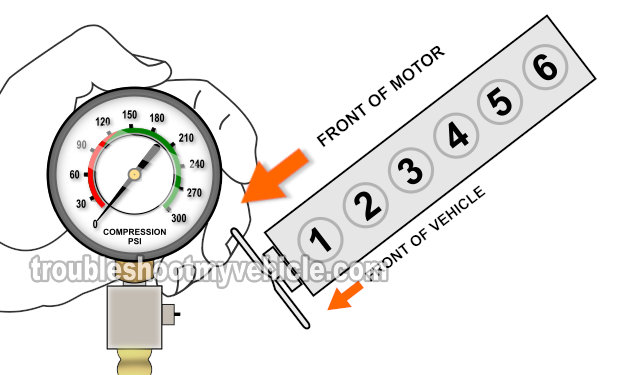
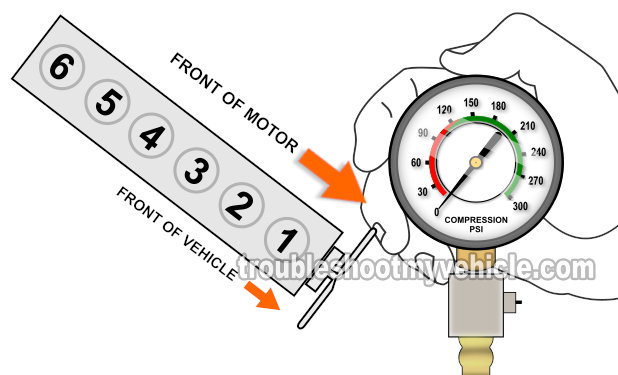
Thread the engine compression gauge into the spark plug hole for the number 1 engine cylinder (this is the spark plug hole closest to the drive belt).
Hand tighten the compression gauge only! Do not use any type of tool to get it tight. - 6
When everything's in place, have someone crank the engine (or you can use a remote start switch) while you watch the needle on the compression tester.
- 7
When the needle stops climbing have your helper stop cranking the engine.
- 8
Write this engine compression value down, along with cylinder number.
- 9
Repeat this test on the remaining 5 cylinders.
Let's take a look at what your test results mean:
CASE 1: Low or no compression in 2 or all 6 cylinders. This test result indicates a serious internal problem.
The most common issues would be:
- Blown head gasket.
- Broken timing chain.
- Engine threw a rod.
CASE 2: Low compression in one or more cylinders. Up to a certain point this could be normal.
But if these values vary too much, then you're gonna' have a bonafide misfire on your hands.
The next step is to do some math to find out if this low compression value is within a normal parameter or not. Go to: Interpreting Your Compression Test Results.
Interpreting Your Compression Test Results
On high-mileage engines, it's not unusual to see that some of the 6 compression values you got are lower than the rest.
If the variation between the low value and the highest value is small enough, your Jeep's 4.0L engine will not suffer any type of engine performance problem.
But if the variation is too big, then you're going to see a misfire problem or a rough idle problem.
The cool thing is that we can easily find out if the low compression values are causing an engine performance problem or not.
To find out, we need to figure out if the low compression values are lower than 15% of the highest compression value you got.
You can do this (figuring out the 15%) in one of two ways: You can calculate this 15% difference with pen and paper or you can use my low compression calculator. You can find the low compression calculator here: Online Low Engine Compression Calculator (at: easyautodiagnostics.com).
If you want to manually calculate the 15% difference, here's what you'll need to do:
- STEP 1: Multiply the highest compression value by 0.15 (this is the decimal value of 15%).
- STEP 2: Round the result to the nearest one (for example: 25.6 would become 26).
- STEP 3: Subtract the result (the number that was rounded) from the highest compression value.
- ANSWER: The result of this subtraction is the lowest possible compression value any cylinder can have.
Now, let me give you a more specific example: Let's say that I got the following compression readings:
| Cylinder | Pressure |
|---|---|
| #1 | 165 PSI |
| #2 | 95 PSI |
| #3 | 155 PSI |
| #4 | 175 PSI |
| #5 | 165 PSI |
| #6 | 170 PSI |
My next step is to do the following calculation:
- STEP 1: 175 x 0.15 = 26.25.
- STEP 2: 26.25 = 26 (rounded to nearest one).
- STEP 3: 175 - 26 = 149.
- ANSWER: 149 PSI. Any cylinder with this compression (or lower) value will misfire.
Since cylinder #2 is only producing 95 PSI, I can now conclude that it's 'dead' and causing a misfire.
To find out if the lowest compression value you got from your engine compression test is within a good range, you'll need to do the same calculation. Of course, you'll need to use the highest compression value you got and not the one in the example.
Once you've found the 'dead' cylinder, the next step is to find out what's causing the low compression value. For this step, go to: TEST 2: Wet Engine Compression Test.
TEST 2: Wet Engine Compression Test

Now, if you're wondering if the low compression reading you just obtained is coming from worn out piston rings or from worn out cylinder head valves -there's a test for that too.
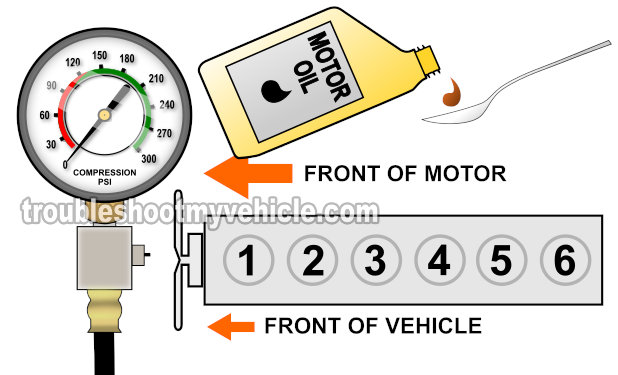
The next step, is to add about 2 tablespoons of engine oil to the cylinder that gave you the low compression reading in the previous page. This is known as a 'wet' compression test.
This is what you'll need to do:
- 1
Add about 2 tablespoons of engine oil into the engine cylinder that gave you the low compression reading in TEST 1.
- 2
Install the compression tester onto this cylinder and hand-tighten it once again.
- 3
When ready, have your helper crank the engine.
- 4
Once the needle stops climbing, have your helper stop cranking the engine.
- 5
You'll see one of two results:
1.) The needle will climb to a reading much higher than before.
2.) The compression tester's will read the exact same reading as before.
Let's take a look at what your test results mean:
CASE 1: The compression tester registered a higher reading. This result indicates that the piston rings are the ones that are worn and are the ones causing the low compression reading.
CASE 2: The compression tester DID NOT register a higher reading. This result indicates that the cylinder head valves are the ones that are worn and are the ones causing the low compression reading.
More 4.0L Jeep Diagnostic Tutorials
To see all of the Jeep 4.0L Wrangler, Cherokee, and Grand Cherokee articles, go to: Jeep 4.0L Index Of Articles.
Here's a sample of the test articles you'll find in the index:
- How To Test The MAP Sensor (1997-2003 Jeep 4.0L).
- How To Test The Fuel Pump In 2 Tests (4.0L Jeep).
- Jeep PWM Fan Relay Test Troubleshooting An Overheating Condition.
- How To Troubleshoot A Bad Fuel Injector (Jeep 4.0L).
- How To Test For A Blown Head Gasket (Jeep 4.0L).

If this info saved the day, buy me a beer!


