")
Testing the EVR solenoid and resolving DTC P1409: EGR Vacuum Regulator Solenoid Circuit Malfunction on your Ford Escape (Mazda Tribute or Mercury Mariner) is pretty easy.
You don't need fancy equipment or expensive tools. With just a few basic tools, you'll be able to test the EVR solenoid yourself.
In this tutorial, I'm going to walk you step by step through the entire test. I'll show you what to look for, what your results mean, and how to figure out —quickly and confidently— if the EVR solenoid is good or bad.
Contents of this tutorial:
- What Does The EGR Vacuum Regulator (EVR) Solenoid Do?
- Where To Buy The EVR Solenoid And Save.
- START HERE: Basic EVR Solenoid Checks.
- TEST 1: Checking The EVR Solenoid's Internal Resistance.
- TEST 2: Bench Testing The EVR Solenoid.
- TEST 3: Making Sure The EVR Solenoid Is Getting Power.
- TEST 4: Making Sure The EVR Solenoid Is Getting An Activation Signal (Using a Scan Tool).
- More 3.0L V6 Ford Escape Diagnostic Tutorials.
APPLIES TO: This tutorial applies to the following vehicles:
- 3.0L V6 Ford Escape: 2001, 2002, 2003, 2004, 2005, 2006, 2007, 2008.
- 3.0L V6 Mazda Tribute: 2001, 2002, 2003, 2004, 2005.
- 3.0L V6 Mercury Mariner: 2005, 2006, 2007, 2008.
What Does The EGR Vacuum Regulator (EVR) Solenoid Do?
 Solenoid Do?. P1409: How To Test The EVR Solenoid (2001, 2002, 2003, 2004, 2005, 2006, 2007, 2008 3.0L V6 Ford Escape, Mercury Mariner, And Mazda Tribute)")
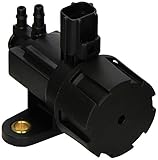
The EGR Vacuum Regulator (EVR) solenoid is an electronically controlled valve that manages the vacuum supply to the EGR valve.
With the key ON, the EVR solenoid receives battery power on one wire, while the Powertrain Control Module (PCM) provides a Ground pulse on the other wire to activate it.
In its normal state, the solenoid is closed, so no vacuum can pass through. In this way, the EVR functions like an on-off switch, but instead of switching electricity, it switches the flow of intake manifold vacuum.
When the PCM commands EGR flow, it energizes the solenoid, which opens and allows intake manifold vacuum to pass through it. This vacuum is then applied to the EGR valve's diaphragm, causing the valve to open and recirculate exhaust gases back into the intake.
Where To Buy The EVR Solenoid And Save

Disclosure: As an Amazon Associate, I earn from qualifying purchases. If my tutorials help you, using these links is an easy way to support the site at no extra cost to you. Thank you!
START HERE: Basic EVR Solenoid Checks
")
Before diving into the step-by-step tests, it's important to cover a few basic checks first. These quick inspections can save you time and effort, since very often the cause of a P1409 code is something simple that you can spot right away.
-
Check the plastic vacuum tubing and rubber connectors —The EVR solenoid has two vacuum ports: one connects to the intake manifold (vacuum source) and the other delivers vacuum to the EGR valve.
Inspect the plastic tubing and the rubber connectors at both ends. Make sure the tubing isn't cracked and the rubber connectors aren't dry-rotted, split, or damaged in any way.
-
Make sure the EVR solenoid is getting vacuum with the engine running —The lower port on the EVR solenoid is the vacuum inlet. Disconnect the solenoid from its vacuum supply rubber connector and, with the engine running, check for vacuum at the end of the rubber connector.
You can use the tip of your fingertip to feel for vacuum. If there's no vacuum here, the solenoid will never be able to function.
-
Check the EVR solenoid's 2-wire electrical connector for damage —Pay close attention to the locking tab on the connector. Because of engine heat and age, it's very common for the locking tab to break. If it's broken, the connector won't lock onto the solenoid securely, and engine vibration can slowly work it loose, causing an intermittent or permanent loss of connection.
Inspect the wiring coming out of the connector —if the insulation is dry-rotted or peeling, the copper strands inside could be exposed and shorting together.
If you find any problems in these areas, correct them first. In many cases, that alone will solve the issue and clear the P1409 code. If everything checks out, then go ahead and move on to TEST 1: Checking The EVR Solenoid's Internal Resistance.
TEST 1: Checking The EVR Solenoid's Internal Resistance
")
Sooner or later, the EVR solenoid is going to wear out and stop functioning. We can easily confirm this by checking its internal resistance to see if it has suffered an open or short-circuit problem.
If the EVR solenoid is OK internally, your multimeter should read between 26-40 Ohms. If it has an internal electrical problem, you'll see one of two things:
- Short circuit: The reading will be close to (or at) zero Ohms.
- Open circuit: The reading will be infinite Ohms.
OK, let's get started with the resistance test:
- 1
Disconnect the EVR solenoid from its electrical connector.
- 2
Set your multimeter to Ohms mode.
- 3
Place the red multimeter test lead on one of the EVR solenoid's terminals.
NOTE: It doesn't matter which lead goes on which terminal for this test. - 4
Place the black multimeter test lead on the other terminal.
- 5
Your multimeter should read: 26–40 Ω.
Let's interpret your test result:
CASE 1: The multimeter registers a resistance value between 26 and 40 Ohms. This tells you that the internal winding of the EVR solenoid is intact and within spec. The solenoid has passed this test.
Our next step is to bench-test the EVR solenoid. Head over to: TEST 2: Bench Testing The EVR Solenoid.
CASE 2: The multimeter shows an open-circuit (OL) or a resistance reading outside of the 26–40 Ohm range. This result means the EVR solenoid's internal winding is defective. The solenoid has failed and needs to be replaced.
When you're ready to swap out the EVR solenoid, I want to recommend the following from Standard Motor Products, a brand I've been using for years and that I don't hesitate to recommend:
- Standard Motor Products VS63 EGR Vacuum Solenoid Valve (Amazon affiliate link).
TEST 2: Bench Testing The EVR Solenoid
In this second test, you're going to check the EVR solenoid's ability to open and close when battery power and Ground are applied.
To safely perform this test, you'll need a set of jumper wires with insulated alligator clips. The insulated clips are important because they prevent the clips from accidentally touching each other and shorting out the circuit.
If you don't have any, these are the ones I used and you can purchase a set here:
- Jumper Wires With Insulated Alligator Clips (Amazon affiliate link).
NOTE: For this test, the EVR solenoid will need to be removed from its location on the engine so you can access its vacuum ports and terminals.
OK, let's get'er done:
- 1
Remove the EVR solenoid from its mounting bracket on the intake manifold plenum.
- 2
Install a short piece of vacuum hose onto the solenoid's vacuum inlet port.
NOTE: This vacuum hose will allow you to apply vacuum during the test. - 3
Attach one jumper wire with an insulated alligator clip to male terminal 1 of the EVR solenoid.
Connect the other end of this jumper wire to the positive (+) terminal of the battery. - 4
Attach a second jumper wire with an insulated alligator clip to male terminal 2 of the EVR solenoid.
Touch the other end of this jumper wire to the negative (–) terminal of the battery. - 5
Listen closely for a distinct "click" sound from the solenoid.
This click tells you the solenoid is activating and opening internally. - 6
While the solenoid is energized, apply vacuum to the inlet hose using a hand vacuum pump or by mouth.
Vacuum should pass through the solenoid and out of the outlet port.
NOTE: You can confirm this by placing the tip of your finger over the outlet port —you should feel vacuum pulling at your fingertip if the solenoid is allowing vacuum to pass through. - 7
Disconnect the jumper wire from the battery negative (-) terminal to de-energize the solenoid.
Apply vacuum again. This time, no vacuum should pass through the solenoid.
Let's interpret your test result:
CASE 1: The solenoid clicked when power and Ground were applied, and vacuum passed through when energized. When power was removed, vacuum did not pass through. This confirms the EVR solenoid is working correctly.
For our next step, we're gonna make sure the EVR solenoid is getting power. Go to: TEST 3: Making Sure The EVR Solenoid Is Getting Power.
CASE 2: The solenoid did not click when power and Ground were applied. This tells you that the solenoid is not activating internally. The EVR solenoid is defective and must be replaced.
When you're ready to replace the EVR solenoid, I want to recommend the following from Standard Motor Products, a solid automotive after-market brand that won't let you down:
- Standard Motor Products VS63 EGR Vacuum Solenoid Valve (Amazon affiliate link).
CASE 3: The solenoid clicked when power and Ground were applied, but vacuum did not pass through when it was energized. This indicates that the solenoid is mechanically stuck or blocked internally and is unable to pass vacuum. The EVR solenoid is defective and must be replaced.
CASE 4: The solenoid continued to pass vacuum when power and Ground were removed. This means the solenoid is stuck open and not sealing internally. The EVR solenoid is defective and must be replaced.
TEST 3: Making Sure The EVR Solenoid Is Getting Power
")
In this third test, we're going to make sure that the EVR solenoid is getting power.
The EVR solenoid receives this voltage through terminal 1 of its 2-wire connector. With the key in the RUN or START position, you should see 10 to 12 Volts DC at this terminal.
For this test, we'll check for voltage only with the key in the RUN position but with the engine OFF. The wire that carries this VPWR voltage to terminal 1 is:
- 2001-2007: white with red stripe (WHT/RED) wire.
- 2008: gray with violet stripe (GRY/VIO) wire.
Let's get going:
- 1
Disconnect the EVR solenoid from its 2-wire connector.
- 2
Turn the key to the RUN position, but do not start the engine.
- 3
Set your multimeter to Volts DC mode.
- 4
Connect the black multimeter test lead to the battery negative (-) post.
- 5
Carefully probe female terminal 1 of the EVR solenoid connector with the red multimeter test lead.
Confirm that the WHT/RED wire actually connects to the terminal.
NOTE: Be very careful when inserting the multimeter probe into terminal 1. If the probe spreads or damages the female terminal, the connector may need to be replaced. - 6
Your multimeter should register 10-12 Volts DC.
Let's interpret your test result:
CASE 1: The multimeter registers 10-12 Volts DC at terminal 1. This confirms that the EVR solenoid is receiving VPWR power.
For our next and last step, we'll check that the EVR solenoid is getting an activation signal. Go to: TEST 4: Making Sure The EVR Solenoid Is Getting An Activation Signal (Using a Scan Tool).
CASE 2: The multimeter DOES NOT register 10-12 Volts DC at terminal 1. This means the EVR solenoid isn't receiving power, and without it, it won't function.
Your next step is to find out why VPWR power is missing at terminal 1 and fix the issue. Once the EVR solenoid gets VPWR power, it'll function again and clear the trouble code.
TEST 4: Making Sure The EVR Solenoid Is Getting An Activation Signal (Using a Scan Tool)
In this test, we're going to use a generic scan tool to activate the EVR solenoid and:
- Check for the presence of its activation signal with a multimeter.
- Confirm its capable of supplying vacuum to the EGR valve with a vacuum gauge.
Our scan tool has to be capable of running enhanced trouble codes —specifically, Ford's Key On Engine Running (KOER) self-test.
Ford's KOER test allows the PCM to automatically command the EVR solenoid ON and OFF (for a few seconds), giving us the perfect opportunity to confirm that it's being activated and that it's actually passing vacuum to the EGR valve.
NOTE: If you don't have a vacuum gauge, you can purchase one here: Vacuum and Fuel Pump Tester Gauge Kit (Amazon affiliate link).
Here's how to set it up:
- 1
Clear all stored trouble codes from the PCM's memory.
- 2
Connect the red multimeter test lead on the battery positive (+) post.
- 3
Connect the black multimeter test lead on the EVR solenoid's activation signal wire.
You can tap into the activation wire using a wire piercing probe on the wire. - 4
Set your multimeter to Volts DC mode.
- 5
Disconnect the vacuum hose from the EGR valve and connect a vacuum gauge to the end of the hose.
NOTE: The vacuum gauge will let you see if the EVR solenoid actually passes vacuum when commanded by the PCM. - 6
Run the KOER test from your scan tool. The PCM will automatically activate the EVR solenoid —usually about 30 seconds into the test. Watch both your multimeter and your vacuum gauge during this period.
- 7
Your multimeter should read 9 to 12 Volts and the vacuum gauge should register 3 in-Hg or more of vacuum when the PCM activates the EVR solenoid.
Let's interpret your test result:
CASE 1: The multimeter displayed 10 to 12 Volts DC when the PCM activated the EVR solenoid, and the vacuum gauge registered 3 in-Hg or more of vacuum. This confirms that the PCM is commanding the EVR solenoid on, and that the solenoid is functioning correctly by passing vacuum to the EGR valve.
The EVR solenoid fault that triggered diagnostic trouble code P1409 isn't present right now, since this test result confirms that the EVR solenoid is functioning correctly.
CASE 2: The multimeter displayed 10 to 12 Volts DC, but the vacuum gauge showed no vacuum at all. This means the EVR solenoid is receiving its activation signal from the PCM, but it's not passing vacuum. The EVR solenoid is defective and needs to be replaced.
The following EVR solenoid is from Standard Motor Products, a brand I've used my entire automotive repair career, and one I don't hesitate to recommend:
- Standard Motor Products VS63 EGR Vacuum Solenoid Valve (Amazon affiliate link).
CASE 3: The multimeter never showed 10 to 12 Volts DC and the vacuum gauge never moved. This tells you the PCM didn't activate the EVR solenoid during the KOER test.
The most likely cause of the missing activation signal from the PCM is an open-circuit in the signal wire between the EVR solenoid connector and the PCM. Your next step is to track down why the signal is missing and restore it to the circuit to get the EVR solenoid working again.
More 3.0L V6 Ford Escape Diagnostic Tutorials
You can find a complete list of 3.0L V6 Ford Escape, Mercury Mariner, and Mazda Tribute diagnostic tutorials in this index:
Here's a sample of the diagnostic tutorials you'll find in the index:
- How To Test The MAF Sensor (2001-2007 Ford 3.0L V6 Ford Escape).
- How To Test Engine Compression (2001-2012 3.0L V6 Ford Escape).
- How To Test For A Blown Head Gasket (2001-2012 3.0L V6 Ford Escape).
- How To Test The Fuel Pump (2001-2004 3.0L Ford Escape).

If this info saved the day, buy me a beer!
