")
Doing a compression test (and more importantly, interpreting the results of it) is not hard to do.
In this article, I'll walk you thru' the whole test in a step-by-step fashion and then I'll explain how to make sense of your test results.
Why do an engine compression test? Well, it may help you to find out if the engine is shot and if this is the reason why it won't start or the reason you have a hard to diagnose misfire condition.
Contents of this tutorial:
ES ![]() You can find this tutorial in Spanish here: Cómo Probar La Compresión Del Motor (Ford 1.9L, 2.0L) (at: autotecnico-online.com).
You can find this tutorial in Spanish here: Cómo Probar La Compresión Del Motor (Ford 1.9L, 2.0L) (at: autotecnico-online.com).
Tools You'll Need:
- Compression Gauge Tester.
- A Helper
- Pen and Paper
Symptoms Of Low Or No Engine Compression
I've noticed, over the years I've been wrenching on cars, that engine compression problems will cause one of two problems:
- The engine does not start.
- The engine starts and runs, but runs with a misfire (rough idle).
On OBD II equipped vehicles, low compression problems will usually set a misfire trouble code:
- P0300: Random Cylinder Misfire.
- P0301: Cylinder #1 Misfire.
- P0302: Cylinder #2 Misfire.
- P0303: Cylinder #3 Misfire.
- P0304: Cylinder #4 Misfire.
You're also gonna' see one or more of the following:
- Bad gas mileage.
- Engine burns oil when accelerating the vehicle on the road.
- Rough idle (or misfire) that goes away once the engine is accelerated.
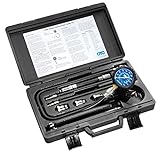
Which Compression Tester Should I Buy?
There are lot of engine compression testers to choose from and many places to buy them. I'm gonna' make three recommendations to you:


Disclosure: As an Amazon Associate, I earn from qualifying purchases. If my tutorials help you, using these links is an easy way to support the site at no extra cost to you. Thank you!
TEST 1: Engine Compression Test
")
To make sense of the results of the engine compression test, you need to know the number of the engine cylinder you're testing and illustration above will help you with this.
Although the compression test is not that hard to do (as you'll see shortly), I suggest you read all of the test steps first and familiarize yourself with them.
By the way, you'll get the most accurate test results if you perform the compression test with the engine in your Ford vehicle slightly warmed up (but not hot).
If your Ford 1.9L or 2.0L vehicle does not start, then no need to worry about -you can still do a compression test.
If your Ford car does start, crank up the engine and let it run for about 10 minutes and no more. If the engine has been running for an extended amount of time, it's important that you let it cool down for at least 45 minutes.
NOTE: If you don't have a compression tester, check out my recommendations here: Which Compression Tester Should I Buy?
OK, this is what you'll need to do:
- 1
Disable the fuel system. You can do this by removing the fuel pump relay.
The reason you need to disable the fuel system is to keep the PCM from injecting fuel into the engine cylinders as you perform the compression test. - 2
Disable the ignition system. This can be done by simply disconnecting the ignition coil pack from its electrical connector.
It's important to disable the ignition system so that you won't have spark firing off at the spark plug wires (while you do the compression test). - 3
Remove all of the spark plugs. As your taking them out, be careful and don't drop any of them on the floor, or you could cause the spark plug's ceramic insulator to break, and this will cause a misfire!
- 4
Thread the engine compression gauge into the spark plug hole for the number 1 engine cylinder.
Hand tighten the compression gauge only! Do not use any type of tool to get it tight. - 5
Ask your helper to crank the engine once the compression gauge is set up and hand tight in the spark plug hole.
- 6
Once the needle stops climbing on your compression gauge, have him or her stop cranking the engine.
- 7
Record on paper the value at which the needle stopped and the number of the engine cylinder on a piece of paper.
- 8
Repeat steps 4 thru' 7 on the remaining three cylinders.
Let's interpret your compression test results:
CASE 1: You got 0 PSI on all four cylinders. This is not good. The engine won't start if all four cylinders have 0 PSI compression.
0 PSI compression across all four cylinders is usually the result of one the following conditions:
- Broken timing belt.
- Blown head gasket.
- Blown engine.
CASE 2: One or more cylinders had low compression. Up to a certain point this is normal. But if the low compression value or values are lower than 15% of the highest, then those cylinders will misfire.
Thankfully, we can easily figure out if these cylinders (with the low compression values) are causing a problem by doing a little math. Go to: Interpreting The Results Of The Engine Compression Test.
Interpreting The Results Of The Engine Compression Test
As the engine accumulates wear and tear, the compression that the cylinders can produce will diminish. Of course this doesn't happen overnight, but eventually it will.
Also, in some cases the cylinders don't wear out at the same rate. This will eventually cause some of them to produce a lower compression value than the others.
If the low compression values vary by more than 15% of the highest compression value your engine is producing, those cylinders will (with the low compression values) will misfire at idle.
You can find out if the compression values you got are causing a problem one of two ways: You can calculate this 15% difference with pen and paper or you can use my low compression calculator. You can find the low compression calculator here: Online Low Engine Compression Calculator (at: easyautodiagnostics.com).
If you want to manually calculate the 15% difference, here's what you'll need to do:
- STEP 1: Multiply the highest compression value by 0.15 (this is the decimal value of 15%).
- STEP 2: Round the result to the nearest one (for example: 25.6 would become 26).
- STEP 3: Subtract the result (the number that was rounded) from the highest compression value.
- ANSWER: The result of this subtraction is the lowest possible compression value any cylinder can have.
Now, let me give you a more specific example: Let's say that my engine compression test produced the following compression readings:
| Cylinder | Pressure |
|---|---|
| #1 | 165 PSI |
| #2 | 95 PSI |
| #3 | 155 PSI |
| #4 | 175 PSI |
My next step is to do the following calculation:
- STEP 1: 175 x 0.15 = 26.25.
- STEP 2: 26.25 = 26 (rounded to nearest one).
- STEP 3: 175 - 26 = 149.
- ANSWER: 149 PSI. Any cylinder with this compression (or lower) value will misfire.
Since cylinder #2 is only producing 95 PSI, I can now conclude that it's 'dead' and causing a misfire.
To find out if the lowest compression value you got from your engine compression test is within a good range, you'll need to do the same calculation. Of course, you'll need to use the highest compression value you got and not the one in the example.
Once you've found the 'dead' cylinder, the next step is to find out what's causing the low compression value. For this step, go to: TEST 2: 'Wet' Engine Compression Test.
TEST 2: 'Wet' Engine Compression Test
")
Once you've found the cylinders with little or no compression, the next step is to add about two tablespoons of oil to that cylinder.
The engine oil that you're gonna' add to the cylinder will help determine if the low cylinder pressure or pressures you recorded in the 'Dry' compression test are caused by worn piston rings or worn cylinder head valves.
Depending on whether the compression pressure rises (on your compression tester) or not, you'll be able to say that the problem lies in the piston's rings or in the cylinder head valves.
OK, this is what you need to do:
- 1
Add a small amount of engine oil to the cylinder that reported low compression or no compression in the 'dry' compression test.
The amount should be about 1 to 2 tablespoons of oil. - 2
Install the compression tester onto the cylinder. Do not use any type of tool to tightened the compression tester. Hand tight is fine.
- 3
When all is set up, have your helper crank the engine.
- 4
You'll get one of two results:
1.) The compression value will go up (from the one you recorded before).
2.) The compression value will stay the same.
Let's take a look at your test results:
CASE 1: The compression value shot up. This tells you that the piston compression rings are worn out and thus the problem is in the bottom end (block) of the engine in your Ford 1.9L, 2.0L.
The reason why, in case you're wondering, is that the oil is helping the worn out compression rings (on the piston) to seal the compression pressure. This is the reason why you're seeing the pressure value jump up on your compression tester.
CASE 2: The compression value stayed the same. This confirms that the problem is in the cylinder head valves.
The reason why is that no amount of oil can help the valve seal against its valve seat (on the cylinder head).
Why An Engine Compression Test?
One of the things that can cause a misfire condition (also known as a miss or dead cylinder), is an engine cylinder or engine cylinders that produce less than normal compression.
When this happens, no matter what gets replaced (like spark plugs, spark plug wires, fuel injectors), nothing solves the miss. This is when the compression test comes in to save the day.
Over the years, I have solved many unsolvable misfire codes, rough idle, lack of power issues by doing a simple engine compression test and if you're faced with something similar, I highly recommend doing an engine compression test.
Related Test Articles
To see all of the Ford 1.9L, 2.0L specific articles here at troubleshootmyvehicle.com, go to: Ford 1.9L, 2.0L Index Of Articles.
Here's a sample of the articles you'll find in the Index of Articles:
- How To Test The Crankshaft Position Sensor (Ford 1.9L, 2.0L).
- Ignition Coil Pack Test (at: easyautodiagnostics.com).
- MAF Sensor Tests (at: easyautodiagnostics.com).

If this info saved the day, buy me a beer!
