")
Checking the fuel pump with a fuel pressure gauge on the 2000-2005 2.0L Dodge/Plymouth Neon is a pretty straightforward procedure. In this tutorial, I'll show you how.
From the results you get from your fuel pump pressure test, you'll be able to conclude whether it's operating correctly or if it needs to be replaced.
You'll also find detailed instructions on how to use starting fluid, to determine if the the engine's no-start problem is due to a lack of fuel.
NOTE: This tutorial only applies to the SOHC engine (single Overhead Camshaft).
Contents of this tutorial:
ES ![]() You can find this tutorial in Spanish here: Cómo Probar La Bomba De Combustible (2000-2005 2.0L SOHC Dodge/Plymouth Neon) (at: autotecnico-online.com).
You can find this tutorial in Spanish here: Cómo Probar La Bomba De Combustible (2000-2005 2.0L SOHC Dodge/Plymouth Neon) (at: autotecnico-online.com).
APPLIES TO: This tutorial applies to the following vehicles:
- 2.0L Dodge Neon: 2000, 2001, 2002, 2003, 2004, 2005.
- 2.0L Plymouth Neon: 2000, 2001, 2002, 2003, 2004, 2005.
1994-1999 FUEL PUMP PRESSURE TEST: You can find the fuel pump pressure test procedure for the 1994-1999 2.0L Dodge/Plymouth Neon here:
IMPORTANT: Gasoline is extremely flammable. Take appropriate safety precautions. Be careful when using the starting fluid, cause it ignites just as easily as gasoline. You can perform both tests without complications if you proceed carefully. Before beginning the tests, make sure the engine is cold, work in a well-ventilated space, and avoid open flames or sparks.
Symptoms Of A Bad Fuel Pump
Fuel pumps usually fail in one of two ways:
- Complete failure: The engine cranks but does not start. In this type of failure, the fuel pump doesn't send any fuel to the injectors.
- Slow failure: The engine cranks and starts but suffers from performance issues, especially under load. This is due to the fact that the fuel pump works, but only sends enough fuel to start the engine. Once the engine is under load, this amount of fuel isn't sufficient to keep it running.
To go into more detail, these are some of the symptoms you'll see from a complete failure of the fuel pump:
- The engine cranks but does not start.
- No fuel pressure is detected.
- No noise from the fuel pump.
These are some of the symptoms of a slow failure of the fuel pump:
- Lack of power when accelerating the engine under load.
- Unexplained loss of power.
- Excessive fuel consumption.
- The engine suddenly shuts off.
Whether the fuel pump is just now starting to fail or has stopped working, you'll be able to find out with a pressure gauge. This tool will make diagnosing issues faster and easier, helping you pinpoint the actual problem instead of taking shots in the dark.
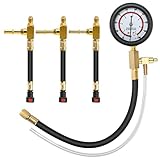
Where To Buy A Fuel Pressure Test Gauge
If you're serious about maintaining your car (and saving money in the process), a fuel pressure gauge is a must-have in your tool box. Fortunately, it can be purchased at almost any auto parts store or on online shopping platforms.
The following fuel pressure gauge kits are great deals and will connect to the vehicles covered in this tutorial:
For vehicles with a Schrader valve on the injector rail:


For vehicles without a Schrader valve on the injector rail:

Disclosure: As an Amazon Associate, I earn from qualifying purchases. If my tutorials help you, using these links is an easy way to support the site at no extra cost to you. Thank you!
Before you buy any of the above fuel pressure test gauge kits for your Dodge/Plymouth Neon, just make sure to check if your Neon has a Schrader valve or not.
Fuel Pressure Specifications
| 2.0L SOHC Neon | ||
|---|---|---|
| Year | KOEO | KOER |
| 2000 | 49 PSI | Not Given |
| 2001-2005 | 53-63 PSI | Not Given |
- KOEO = Key On Engine Off).
- KOER = Key On Engine Running.
Fuel Pressure Test With A Gauge (With Schrader Valve)
. How To Test The Fuel Pump (2000, 2001, 2002, 2003, 2004, 2005 2.0L SOHC Dodge/Plymouth Neon)")
NOTE: If the engine of your Dodge/Plymouth Neon comes equipped with a Schrader valve, you're in the right section. If your Neon doesn't have a Schrader valve, go to this section: Fuel Pressure Test With A Gauge (Without Schrader Valve).
According to the factory repair manual, you need a professional level scan tool to activate the fuel pump and check its pressure output with the key on and the engine off, which is great if you have one.
But there's another alternative: if the engine starts, simply disconnect the electrical connectors from the fuel injectors and crank the engine. The following steps assume that you're not using a scan tool to activate the fuel pump and check the pressure.
OK, let's get started:
- 1
Disconnect the four fuel injectors from their electrical connectors.
NOTE: This step only applies if the engine cranks and starts. - 2
Remove the dust cap from the Schrader valve on the fuel injector rail.
- 3
Place a towel under the area of the Schrader valve.
- 4
Connect the fuel pressure gauge to the Schrader valve.
With the towel, wipe off any fuel that may have been released during the gauge connection process. - 5
When you're ready, ask your assistant to crank the engine while you observe the gauge.
- 6
The gauge should report the specified fuel pressure.
Let's take a look at what your results mean:
CASE 1: The fuel pump pressure is within specification. This tells you that the fuel pump is in good working condition and is supplying fuel to the injectors.
If your Neon's engine does not start, you can now eliminate the fuel pump as the cause of the 'cranks but does not start' problem.
CASE 2: The fuel pump pressure is NOT within specification. This result tells you that the fuel pump is not working. Since the fuel pump isn't working, you can now conclude that it's behind the 'cranks but does not start' issue with your Neon.
Fuel Pressure Test With A Gauge (Without Schrader Valve)
")
")
If your Neon doesn't have a Schrader valve on the injector rail, you can still check the fuel pump pressure. You just need a different adapter for the gauge.
In these vehicles, you'll connect the gauge where the fuel supply line enters the injector rail. In the photo above, the orange arrow shows you where.
According to the factory repair manual, the way you need to check the fuel pump pressure is by using an expensive professional grade scan tool to activate it with the key on and the engine off.
But there's another way: if the engine starts, simply disconnect the electrical connectors from the fuel injectors and crank the engine. The steps below assume that you're not using a scanner to activate the fuel pump and check the pressure.
OK, here are the steps for the test:
- 1
Disconnect the four fuel injectors from their electrical connectors.
NOTE: This step only applies if the engine cranks and starts. - 2
Disconnect the fuel inlet line from the injector rail.
NOTE: As a safety measure, place a towel in the area under the fuel line to catch/absorb any spilled fuel. - 3
Connect the gauge adapter to the injector rail.
- 4
Connect the fuel supply line you just disconnected to the adapter.
- 5
Connect the gauge to the adapter.
- 6
When you're ready, ask your assistant to crank the engine while you observe the gauge.
- 7
The gauge should report the specified fuel pressure.
Let's take a look at what your results mean:
CASE 1: The fuel pump pressure is within specification. This tells you that the fuel pump is in good working condition and is supplying fuel to the injectors.
If your Neon's engine does not start, then the result of this test now rules out the fuel pump as the source of the 'cranks but does not start' issue with the engine.
CASE 2: The fuel pump pressure is NOT within specification. This result tells you that the fuel pump is not working. Since the fuel pump isn't working, you can now conclude that it's behind the 'cranks but does not start' issue with your Neon.
Using Starting Fluid To Test For A Lack Of Fuel
")
Performing a starting fluid test is a simple and quick process that'll help you determine if the engine won't start due to a lack of fuel. However, it's important to note that this test is not as accurate as actually measuring the fuel pump's pressure output with a gauge.
Another crucial point you should consider is that, before starting and in order to get an accurate result from this test, you need to make sure all four cylinders are receiving spark.
You can easily find this out by using a spark tester and testing the spark on each spark plug wire. Once you've verified that all cylinders have spark, you'll be ready for the starting fluid test.
OK, here are the steps for the test:
- 1
Remove the air intake duct from the throttle body.
You don't have to remove it completely, as you'll need to reconnect it in one of the following steps. - 2
Manually open the throttle plate and spray starting fluid into the throttle body bore.
- 3
Quickly reconnect the air intake duct to the throttle body (you don't need to tighten the hose clamp).
NOTE: Reconnecting the air intake duct is a very important safety precaution in case of a backfire through the intake manifold. - 4
Crank the engine once the air intake duct is back on the throttle body.
- 5
You'll get one of two results:
1.) The engine will momentarily start, run, and then shut off after a few seconds.
2.) The engine will only crank but won't start at all.
Alright, let's find out what your test results mean:
CASE 1: The engine started and ran for a few seconds. This confirms that your vehicle's 'cranks but does not start' problem is due to a lack of fuel.
I suggest that your next step should be to test the fuel pump's pressure with a gauge. For this test, go to:
- Fuel Pressure Test With A Gauge (With Schrader Valve).
- Fuel Pressure Test With A Gauge (Without Schrader Valve).
CASE 2: The engine DID NOT start, not even momentarily. This tells you that a lack of fuel is not behind the engine not starting.

If this info saved the day, buy me a beer!
