")
Doing an engine compression test on your 2.0L Dodge Stratus (Plymouth Breeze) isn't difficult! Especially since the spark plugs are easy to get to. This guide will walk you through the engine compression test steps and, more importantly, help you make sense of your compression readings.
Whether your the engine compression problem is causing an engine cylinder misfire or an engine no-start problem, this tutorial has got you covered.
Contents of this tutorial:
ES ![]() You can find this tutorial in Spanish here: Cómo Probar La Compresión Del Motor (1995-2000 2.0L Dodge Stratus, Plymouth Breeze) (at: autotecnico-online.com).
You can find this tutorial in Spanish here: Cómo Probar La Compresión Del Motor (1995-2000 2.0L Dodge Stratus, Plymouth Breeze) (at: autotecnico-online.com).
APPLIES TO: Applies to the following vehicles:
- 2.0L Dodge Stratus: 1995, 1996, 1997, 1998, 1999, 2000.
- 2.0L Plymouth Breeze: 1996, 1997, 1998, 1999, 2000.
CYLINDER MISFIRE DIAGNOSTICS:
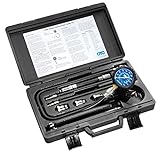
Tools You'll Need:
- Compression gauge tester
- Engine oil
- A helper
- Pen and paper

Important Tips And Suggestions
TIP 1: If the engine in your Stratus (Breeze) starts and runs, it's best to do the compression test with a slightly warmed up engine as this will increase the accuracy of your compression test results.
It's important to note that the engine should not be hot, so if it has been running for any length of time, let it cool down completely before beginning to avoid the risk of stripping the spark plug hole threads.
If the engine doesn't start then don't worry about this, since you'll still be able to get a compression test result you can use.
TIP 2: You'll need a helper to crank the engine for you, while you eye-ball the compression tester.
My suggestion to your helper wait outside the vehicle till you're done setting up the test. Once the test is done, ask you helper to wait outside again. This will help you to avoid having him or her accidentally crank the engine while you're setting up the test.
TIP 3: The compression test is conducted while the engine is cranking. Exercise caution around moving parts to avoid injury. Always wear protective gloves and eyewear, and keep hands and tools away from belts and fan blades.
Symptoms Of Low Or No Engine Compression
An engine suffering from engine compression problems will usually have one of two problems. One, it won't start. Two, it'll run rough or have one or more misfiring cylinders.
- Hard Starting: If the engine doesn't have enough compression, it'll have difficulty igniting the fuel-air mixture, making the engine hard to start.
- Misfire: Insufficient or uneven compression can lead to an engine misfire, where one or more cylinders aren't contributing to the engine's power. You'll see one or more of the following misfire trouble codes registered in the computer's memory.
- P0300: Random Cylinder Misfire.
- P0301: Cylinder #1 Misfire.
- P0302: Cylinder #2 Misfire.
- P0303: Cylinder #3 Misfire.
- P0304: Cylinder #4 Misfire.
- Rough Idle: When there's a lack of compression in one or more cylinders, it can cause the engine to run unevenly at idle. This might make the vehicle shake or vibrate. It generally improves as you rev the engine.
- Loss of Power: Reduced compression often leads to a significant loss in engine power and efficiency. Your car might not accelerate as quickly as it should.
- Poor Fuel Economy: Because the engine isn't running efficiently, you may notice that you're getting fewer miles per gallon.
- Increased Emissions: Lower compression can lead to incomplete combustion, releasing more pollutants than usual.
- Engine Noise: A "knocking" sound can sometimes be heard, especially when the vehicle is idling.
- Warning Lights: The "Check Engine" light or other warning lights on your dashboard might illuminate.
- Smoky Exhaust: You may notice blue smoke coming out of the exhaust pipe, which is a sign of engine oil burning in the cylinder(s).
- Engine doesn't start: This usually occurs when most of the engine cylinders have very low to zero compression.
- Engine cranks faster than normal: When you crank the engine over, it cranks very fast and this fast cranking speed is very noticeable.
Which Compression Tester Should I Buy?
There are lot of engine compression testers to choose from and many places to buy them. I'm gonna' make some recommendations to you:


Disclosure: As an Amazon Associate, I earn from qualifying purchases. If my tutorials help you, using these links is an easy way to support the site at no extra cost to you. Thank you!
TEST 1: Dry Engine Compression Test
")
You'll need to remove the spark plugs to perform the engine compression test on your Stratus (Breeze). As you remove them, check each one for visible signs of wear and tear, or indications of oil burning in the cylinder.
Also, take note if the spark plug tubes are full of engine oil, which could be a sign of leaking valve cover tube seals.
If any of these issues are present, you'll need to investigate further, as they could be the cause of the cylinder misfire or engine no-start problem you're trying to diagnose.
OK, let's get started:
- 1
Disconnect all 4 fuel injectors from their electrical connectors.
This is to prevent the fuel injectors from injecting fuel into the engine cylinders. - 2
Disconnect the ignition coil pack from its electrical connector.
It's important that, while you're doing the test, no spark is fired from the spark plug wires. You can easily accomplish this by disconnecting the ignition coil pack. - 3
Remove all four spark plugs.
CAUTION: Never remove spark plugs from a hot engine to avoid the risk of stripping the threads in the aluminum cylinder head. Always allow the engine to cool down completely before proceeding with spark plug removal.
Take care not to drop any of them, since dropping them can damage them and cause a misfire condition later. - 4
Thread the engine compression gauge into the spark plug hole for the number 1 engine cylinder (this is the spark plug hole closest to the drive belt).
NOTE: Hand tighten the compression gauge only! Do not use any type of tool to get it tight. - 5
Have your helper crank the engine.
Now the engine will not start (of course), but the idea is to crank the engine long enough to have the compression tester gauge's needle stop climbing. This usually takes about 10 seconds of cranking. - 6
When the needle stops moving (as the engine is being cranked), have your helper stop cranking the engine.
- 7
Write down the compression reading, along with the cylinder's number, on a piece of paper.
- 8
Repeat steps 4 thru' 7 on the remaining cylinders.
Now, let's take a look at what your test results mean:
CASE 1: Your compression tester recorded NO compression on all cylinders. This isn't good and tells you that you have one of the following problems:
- Broken timing belt.
- Blown head gasket.
- Engine threw a rod.
CASE 2: Your compression tester recorded low or no compression on one or two cylinders. The next step is to interpret those numbers (compression numbers) you obtained from the tests. Go to: Interpreting The Results Of The Engine Compression Test.
Interpreting The Results Of The Engine Compression Test
Slight variations in engine compression readings are normal. However, if a cylinder's compression is more than 15% lower than the highest reading, it could mean that cylinder is failing and might be the cause of issues like rough idling or misfires.
Calculating the 15% difference between the compression levels of cylinders isn't difficult at all. In this section, I'll explain how to do it so you'll easily find out if any cylinder is underperforming.
You can do this one of two ways: You can calculate this 15% difference with pen and paper or you can use my low compression calculator. You can find the low compression calculator here: Online Low Engine Compression Calculator (at: easyautodiagnostics.com).
If you want to manually calculate the 15% difference, here's what you'll need to do:
- STEP 1: Multiply the highest compression value by 0.15 (this is the decimal value of 15%).
- STEP 2: Round the result to the nearest one (for example: 25.6 would become 26).
- STEP 3: Subtract the result (the number that was rounded) from the highest compression value.
- ANSWER: The result of this subtraction is the lowest possible compression value any cylinder can have.
Now, let me give you a more specific example: Let's say that my engine compression test produced the following compression readings:
| Cylinder | Pressure |
|---|---|
| #1 | 165 PSI |
| #2 | 95 PSI |
| #3 | 155 PSI |
| #4 | 175 PSI |
My next step is to do the following calculation:
- STEP 1: 175 x 0.15 = 26.25.
- STEP 2: 26.25 = 26 (rounded to nearest one).
- STEP 3: 175 - 26 = 149.
- ANSWER: 149 PSI. Any cylinder with this compression (or lower) value will misfire.
Since cylinder #2 is only producing 95 PSI, I can now conclude that it's 'dead' and causing a misfire.
To find out if the lowest compression value you got from your engine compression test is within a good range, you'll need to do the same calculation. Of course, you'll need to use the highest compression value you got and not the one in the example.
Once you've found the 'dead' cylinder, the next step is to find out what's causing the low compression value. For this step, go to: TEST 2: Wet Engine Compression Test.
TEST 2: Wet Engine Compression Test
")
Now that you've found one or more cylinders with low compression, the next step is a "wet" compression test.
The "wet" compression test simply involves adding a bit of engine oil —around two tablespoons— into the low-performing cylinder and retesting its compression.
Once you get the compression value of this "wet" test, we'll compare it to the initial "dry" value you got in TEST 1. This will help you pinpoint whether the issue lies with the piston rings or the cylinder head valves.
OK, these are the test steps:
- 1
Add a small amount of engine oil to the cylinder that reported low compression or no compression in the 'dry' compression test
The amount should be about 1 to 2 tablespoons of oil. - 2
Install the compression tester onto the cylinder.
NOTE: Do not use any type of tool to tightened the compression tester. Hand tight is fine. - 3
When all is set up, have your helper crank the engine.
- 4
You'll get one of two results:
1.) The compression value will go up (from the one you recorded before).
2.) The compression value will stay the same.
Let's take a look at what your test results mean:
CASE 1: The compression value shot up. This tells you that the piston compression rings are worn out and thus the problem is in the bottom end (block) of the engine.
Here's why: When you add oil to the cylinder, it acts as a temporary sealant. It fills in the gaps where the piston rings are failing to seal properly against the cylinder wall. The added oil improves the seal and thereby increases the compression levels when you crank the engine for the test. This almost restores the compression value to what it should be if the rings were in good condition.
CASE 2: The compression value stayed the same. This confirms that the problem is in the cylinder head valves.
Here's why: When the cylinder head valves or their seats are damaged —perhaps even bent due to a snapped timing belt— adding engine oil won't improve the cylinder's compression. So, if you don't see an increase in compression for the cylinder you're testing after adding oil, it's a clear sign that the issue lies with the cylinder head valves.

If this info saved the day, buy me a beer!

