TEST 1: Shift Solenoid Resistance Test


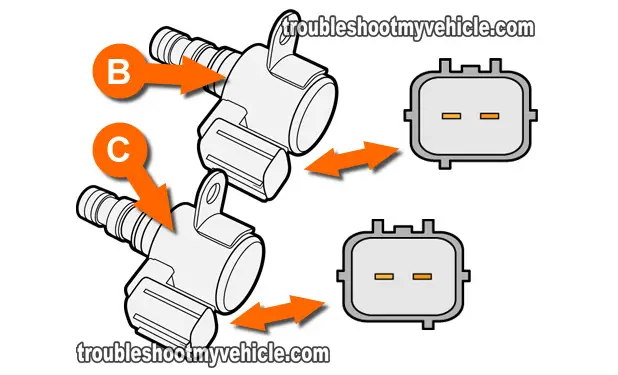
Both shift solenoid B and shift solenoid C are tested in the exact same way, so the test instruction below apply to them both.
The first thing we'll do is measure the resistance of the solenoid (B or C) with a multimeter in Ohms mode and see if it's up to specification.
You'll also be able to see if the shift solenoid's connector isn't broken (I've seen this quite a bit).
NOTE: The easiest, fastest way to test the shift solenoid B or shift solenoid C is off of the car.
OK, this is what you need to do:
- 1
Place your multimeter in Ohms mode.
Don't have a multimeter or need to upgrade yours? Check out my recommendation: Buying A Digital Multimeter For Automotive Diagnostic Testing (found at: easyautodiagnostics.com). - 2
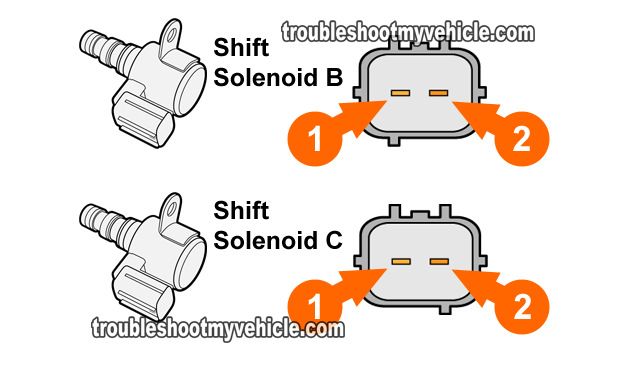
Measure the resistance between solenoid pins #1 and #2.
Remember, this test applies to either shift solenoid B or shift solenoid C. - 3
Your multimeter should register 12-25 Ohms if the shift solenoid is within specification.
Let's examine your test result:
CASE 1: The resistance was 12 to 25 Ohms. This test result tells you that the solenoid's internal coil is OK.
The next step is to bench-test the shift solenoid and apply 12 Volts and Ground to it. For this test, go to: TEST 2: Manually Applying Power And Ground.
CASE 2: The resistance WAS NOT 12 to 25 Ohms. This test result tells you that the shift solenoid that you're testing is fried and needs to be replaced.
If you're testing shift solenoid B, then this test result confirms trouble code P0758: Shift Solenoid B Electrical.
If you're testing shift solenoid C, then this test result confirms trouble code P0763: Shift Solenoid C Electrical.
TEST 2: Manually Applying Power And Ground


In this test, we're gonna' manually apply power and Ground to the shift solenoid.
The easiest and safest way to do this is using a power probe but not everyone has one (not too mention that they're kinda' expensive).
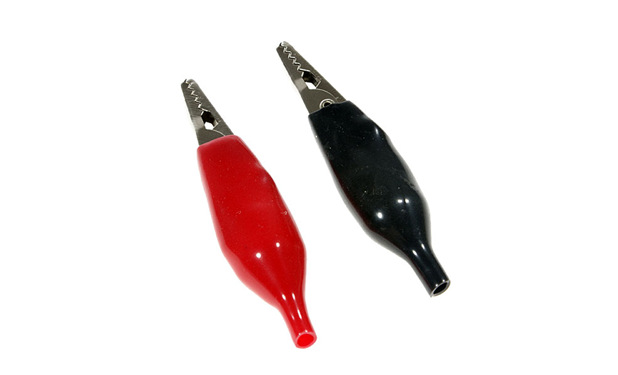
You can make your own jumper wires and I suggest using alligator clips with rubber insulating protectors (see photo 3 of 3 in the image viewer).
Using alligator clips with rubber insulating protectors will help you avoid shorting out the jumper wire that's carrying the juice (from the battery) to the solenoid.
OK, this is what you need to do:
- 1
Connect solenoid terminal #2 to battery power.
NOTE: Take all safety precautions when applying these 12 Volts to the terminal. - 2
Connect solenoid terminal #1 to Ground.
- 3
You should hear a clicking sound as soon as you Ground solenoid terminal #1.
Let's see what your test result means:
CASE 1: The shift solenoid clicked. This is the correct and expected test result.
If you're still having a shift solenoid B or a shift solenoid C trouble code, take a look at the test suggestions found here: Solenoids Are Good But Transmission Still Not Shifting.
CASE 2: The shift solenoid DID NOT click. This test result tells you that the shift solenoid you just got done testing is fried and needs to be replaced.
If you're testing shift solenoid B, then this test result confirms trouble code P0758: Shift Solenoid B Electrical.
If you're testing shift solenoid C, then this test result confirms trouble code P0763: Shift Solenoid C Electrical.


