")
You can quickly and easily test the manifold absolute pressure (MAP) sensor with a multimeter, and in this tutorial, I'll show you how.
With your test results, you'll easily determine if the MAP sensor is good or bad on your 2001-2005 1.7L Honda Civic.
Contents of this tutorial:
- Symptoms Of A Bad MAP Sensor.
- Where To Buy The MAP Sensor And Save.
- MAP Sensor Circuit Descriptions.
- TEST 1: Testing The MAP Sensor Signal.
- TEST 2: Making Sure The MAP Sensor Is Getting 5 Volts.
- TEST 3: Making Sure The MAP Sensor Is Getting Ground.
- MAP Sensor Code Won't Go Away.
- More 1.7L Honda Civic Tutorials.
APPLIES TO: This tutorial applies to the following vehicles:
- 1.7L Honda Civic DX: 2001, 2002, 2003, 2004, 2005.
- 1.7L Honda Civic EX: 2001, 2002, 2003, 2004, 2005.
- 1.7L Honda Civic GX: 2001, 2002, 2003, 2004, 2005.
- 1.7L Honda Civic HX: 2001, 2002, 2003, 2004, 2005.
- 1.7L Honda Civic LX: 2001, 2002, 2003, 2004, 2005.
Symptoms Of A Bad MAP Sensor
The MAP sensor is a critical component of the engine management system, and as such, when it fails, the check engine light will be illuminated. Not only that, but engine performance will suffer.
You'll see one or more of the following trouble codes:
- P0107: MAP Sensor Circuit Low Voltage.
- P0108: MAP Sensor Circuit High Voltage.
- P1128: MAP Sensor Signal Lower Than Expected.
- P1129: MAP Sensor Signal Higher Than Expected.
You'll also see one or more of the following symptoms:
- The engine won't start.
- The engine takes a long time to start (extended cranking time).
- Black smoke coming out of the tailpipe.
- Bad gas mileage.
- The engine idles rough when running.
- A lack of power when under load.
You can learn more about the MAP sensor here: What Does The MAP Sensor Do? (1.7L Honda Civic).
Where To Buy The MAP Sensor And Save
The following links will help you comparison shop for the manifold absolute pressure (MAP) sensor. All of the recommended MAP sensors are of known automotive brands -no knockoff MAP sensors!

Disclosure: As an Amazon Associate, I earn from qualifying purchases. If my tutorials help you, using these links is an easy way to support the site at no extra cost to you. Thank you!
Not sure if the MAP sensor fits your particular 1.7L Honda Civic? Don't worry, once you get to the site they'll make sure it fits by asking you the specifics of your particular Civic. If it doesn't fit, they'll find you the right MAP sensor.
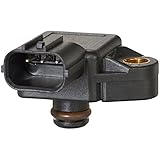
MAP Sensor Circuit Descriptions
")
| Wire | Color | Description |
|---|---|---|
| 1 | yellow with red stripe (YEL/RED) | 5 Volts DC |
| 2 | green with red stripe (GRN/RED) | MAP signal |
| 3 | green with white stripe (GRN/WHT) | Ground |
TEST 1: Testing The MAP Sensor Signal
As you're probably already aware, the manifold absolute pressure (MAP) sensor's voltage signal reacts to the vacuum pressure that's applied to the sensor.
In a nutshell, the MAP sensor's voltage signal decreases/increases as vacuum is applied/released to it.
If the MAP sensor is bad, it'll stay stuck, producing one voltage value as you apply/release vacuum to it.
The cool thing is you can easily test the MAP sensor's voltage signal output, and that's what you'll do in this test section.
NOTE: If you don't have a vacuum pump, don't worry. You can use your mouth to apply vacuum to the MAP sensor.
IMPORTANT: The MAP sensor must remain connected to its electrical connector to read the voltage within its signal wire. You'll need to use a back probe on the connector or a wire piercing probe on wire. You can see an example of this tool here: Wire Piercing Probe.
OK, these are the test steps:
- 1
Remove the MAP sensor from its place on the intake manifold.
- 2
If you had to disconnect the MAP sensor from its electrical connector to remove it, reconnect it to the connector now.
- 3
Connect your vacuum pump to the MAP sensor's vacuum inlet.
You'll need to use a piece of vacuum hose to connect the vacuum pump to the MAP sensor. - 4
Place your multimeter in Volts DC mode.
- 5
Connect the red multimeter probe to the wire labeled with the number 2 (in the image above).
The wire labeled with the number 2 is the green with red stripe (GRN/RED) wire of the connector.
IMPORTANT: The MAP sensor must remain connected to its 3 wire connector. - 6
Connect the black multimeter test lead directly to the battery negative (-) terminal.
- 7
Turn the key ON but don't start the engine.
- 8
At this point your multimeter should register a value around 4.5 Volts DC.
- 9
Now, pump the vacuum pump to apply vacuum to the MAP sensor. The voltage should decrease.
- 10
Release the vacuum you applied to the MAP sensor. The voltage should increase.
OK, let's examine your test results:
CASE 1: The MAP voltage signal decreased/increased as you applied/released vacuum to the sensor. This test result confirms that the MAP sensor is functioning correctly.
Now, if the check engine light keeps illuminating with a MAP sensor diagnostic trouble code, take a look at the section: MAP Sensor Code Won't Go Away for more info.
CASE 2: The MAP voltage signal DID NOT increase/decrease as you applied/released vacuum. This test result usually tells you that the MAP sensor is defective.
To be absolutely sure the MAP sensor is bad, make sure that it's getting both power and Ground. Go to the next test: MAP TEST 2: Making Sure The MAP Sensor Is Getting 5 Volts.
CASE 3: Your multimeter registered 0 Volts. This test result usually means that the MAP sensor is bad but not always.
There's a good chance that the MAP sensor is not getting power or Ground. So the next step is to make sure that the MAP sensor is getting five votes from the fuel injection computer. Go to: MAP TEST 2: Making Sure The MAP Sensor Is Getting 5 Volts.
