")
Doing a compression test on your 2.0L (SOHC/DOHC) or 2.4L (SOHC/DOHC) has now become an easy thing! This tutorial will show you how to do the engine compression test and more importantly, how to interpret the results of the compression readings you're gonna' get from the compression tester.
This article is geared towards solving a misfire condition (with or without codes: P0300, P0301, P0302, P0303, P0304) or a rough idle condition, although if your vehicle does not start, this info still applies.
Contents of this tutorial:
ES ![]() You can find this tutorial in Spanish here: Cómo Probar La Compresión Del Motor (Chrysler 2.0L, 2.4L) (at: autotecnico-online.com).
You can find this tutorial in Spanish here: Cómo Probar La Compresión Del Motor (Chrysler 2.0L, 2.4L) (at: autotecnico-online.com).
Tools You'll Need:
- Compression gauge tester
- Engine oil
- A helper
- Pen and paper

Important Tips And Suggestions
TIP 1: If your 2.0L or 2.4L Chrysler vehicle cranks and starts then it's best to do the compression test with a slightly warmed up engine.
This is because as the engine warms up, all of its metal moving parts (like piston rings, valves) expand with the heat the engine is creating. This will have an effect (however small) on your compression tester reading.
If the engine doesn't start then don't worry about this, since you'll still be able to get a compression test result you can use.
TIP 2: You'll need a helper to crank the engine for you, while you eye-ball the compression tester.
My suggestion to your helper wait outside the vehicle till you're done setting up the test. Once the test is done, ask you helper to wait outside again. This will help you to avoid having him or her accidentally crank the engine while you're setting up the test.
Symptoms Of Low Or No Engine Compression
When only one engine cylinder is affected with low or no engine compression, you'll feel a miss (misfire) and you can usually bet that the PCM will set a misfire trouble code:
- P0300: Random Cylinder Misfire.
- P0301: Cylinder #1 Misfire.
- P0302: Cylinder #2 Misfire.
- P0303: Cylinder #3 Misfire.
- P0304: Cylinder #4 Misfire.
Unfortunately the PCM won't always set a misfire code to tell you which cylinder is the one that's missing.
The next common scenario is having Low or No engine compression on two engine cylinders. When this happens, the engine in your car will crank but not start. This usually indicates a blown head gasket.
If a blown head gasket is a concern then take a look at this tutorial I've written: How To Test For A Blown Head Gasket (Chrysler 2.0L, 2.4L).
When you have a situation where you have NO compression on ALL 4 cylinders, you'll see:
- When you crank the engine over, it cranks very fast and this fast cranking speed is very noticeable.
- You'll have spark (in every cylinder), so you know it's not an ignition system issue.
- The fuel injectors spray fuel.
- You can confirm this with a Noid light test.
- Also, you can confirm this, although indirectly, by removing the spark plugs and checking to see if they are fuel soaked (fuel fouled).
- The most common causes of this scenario, are:
- Blown head gasket.
- Broken timing belt (which is the most common scenario).
- Engine thru' a rod.
Now, hopefully you don't have any of the above conditions affecting the engine in your car but there's only one way to find, so let's get testing.
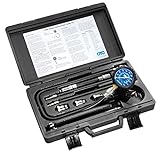
Which Compression Tester Should I Buy?
There are lot of engine compression testers to choose from and many places to buy them. I'm gonna' make three recommendations to you:


Disclosure: As an Amazon Associate, I earn from qualifying purchases. If my tutorials help you, using these links is an easy way to support the site at no extra cost to you. Thank you!
TEST 1: Dry Engine Compression Test
")
Before you jump into the tests, read this entire tutorial first. Be sure you're familiar with the test steps and above all, take all necessary safety precautions, since you'll be working around a cranking engine. Take your time, be alert and use common sense.
This test article assumes that the engine starts and runs and that you're testing a misfire condition. But if engine cranks but does not start, don't worry -you can still use the info in this tutorial.
OK, let's get this show on the road:
- 1
Disconnect all 4 fuel injectors from their electrical connectors.
This may not be possible on all models (since some of the fuel injectors may be inaccessible due to the intake manifold plenum covering them). The next best thing is to remove the Auto Shut Down (ASD) Relay. This will also prevent fuel injectors from injecting fuel into the engine cylinders. This step is important! - 2
Disable the ignition system.
It's important that, while you're doing the test, no spark is fired from the spark plug wires. You can easily accomplish this by disconnecting the ignition coil pack. - 3
Remove all of the spark plugs.
Take care not to drop any of them, since dropping them can damage them and cause a misfire condition later. - 4
Thread the engine compression gauge into the spark plug hole for the number 1 engine cylinder (this is the spark plug hole closest to the drive belt).
Hand tighten the compression gauge only! Do not use any type of tool to get it tight. - 5
Have your helper crank up the engine.
Now the engine will not start (of course), but the idea is to crank the engine long enough to have the compression tester gauge's needle stop climbing. This usually takes about 10 seconds of cranking. - 6
When the needle stops moving (as the engine is being cranked), have your helper stop cranking the engine.
- 7
Write down this compression reading, along with the cylinder's number, on a piece of paper.
- 8
Repeat steps 5 thru' 7 on the rest of the cylinders.
Now, let's take a look at what your test results mean:
CASE 1: Your compression tester recorded NO compression on all cylinders. This isn't good and tells you that you have one of the following problems:
- Broken timing belt.
- Blown head gasket.
- Engine thru' a rod and is now junk.
CASE 2: Your compression tester recorded low or no compression on one or two cylinders. The next step is to interpret those numbers (compression numbers) you obtained from the tests. Go to: Interpreting The Results Of The Engine Compression Test.
Interpreting The Results Of The Engine Compression Test
It's not unusual to obtain compression readings that vary from each other. But if they vary too much, you'll have a rough idle or a misfire condition on your hands. So the next step is to find out if the low compression value or values are causing a problem.
You can do this by figuring out (mathematically) if the low compression value varies by more than 15% of the highest compression value you obtained from your tests.
Why? Because if the low compression value varies by more than 15%, then this cylinder is going to misfire and can be considered 'dead'.
You can do this one of two ways: You can calculate this 15% difference with pen and paper or you can use my low compression calculator. You can find the low compression calculator here: Online Low Engine Compression Calculator (at: easyautodiagnostics.com).
If you want to manually calculate the 15% difference, here's what you'll need to do:
- STEP 1: Multiply the highest compression value by 0.15 (this is the decimal value of 15%).
- STEP 2: Round the result to the nearest one (for example: 25.6 would become 26).
- STEP 3: Subtract the result (the number that was rounded) from the highest compression value.
- ANSWER: The result of this subtraction is the lowest possible compression value any cylinder can have.
Now, let me give you a more specific example: Let's say that my engine compression test produced the following compression readings:
| Cylinder | Pressure |
|---|---|
| #1 | 165 PSI |
| #2 | 95 PSI |
| #3 | 155 PSI |
| #4 | 175 PSI |
My next step is to do the following calculation:
- STEP 1: 175 x 0.15 = 26.25.
- STEP 2: 26.25 = 26 (rounded to nearest one).
- STEP 3: 175 - 26 = 149.
- ANSWER: 149 PSI. Any cylinder with this compression (or lower) value will misfire.
Since cylinder #2 is only producing 95 PSI, I can now conclude that it's 'dead' and causing a misfire.
To find out if the lowest compression value you got from your engine compression test is within a good range, you'll need to do the same calculation. Of course, you'll need to use the highest compression value you got and not the one in the example.
Once you've found the 'dead' cylinder, the next step is to find out what's causing the low compression value. For this step, go to: TEST 2: Wet Engine Compression Test.
TEST 2: Wet Engine Compression Test
")
The above compression test is known as a 'dry' compression test. The next step (after finding cylinders with low compression) is to do a 'wet' compression test.
This involves adding a few drops (2 tablespoons) of engine oil to the cylinders with the low engine compression result and repeating the compression test.
The results you obtain from this second 'wet' compression test will help you determine if the low compression you recorded in the 'dry' compression test are caused by worn piston rings or worn cylinder head valves.
OK, this is what you need to do:
- 1
Add a small amount of engine oil to the cylinder that reported low compression or no compression in the 'dry' compression test
The amount should be about 1 to 2 tablespoons of oil. - 2
Install the compression tester onto the cylinder.
Do not use any type of tool to tightened the compression tester. Hand tight is fine. - 3
When all is set up, have your helper crank the engine.
- 4
You'll get one of two results:
1.) The compression value will go up (from the one you recorded before).
2.) The compression value will stay the same.
Let's take a look at what your test results mean:
CASE 1: The compression value shot up. This tells you that the piston compression rings are worn out and thus the problem is in the bottom end (block) of the engine in your 2.0L or 2.4L Chrysler vehicle.
Here's why: The engine oil helped the piston rings seal better, thus bringing up the compression value almost back to normal.
CASE 2: The compression value stayed the same. This confirms that the problem is in the cylinder head valves.
Here's why: If the cylinder head valves and their seats are worn out (or maybe even bent from a broken timing belt), no amount of engine oil is gonna help seal the compression in, in the cylinder. So, if the compression value, for the specific cylinder you're testing did not go up (after you added oil to it) then this is a dead giveaway that you've got cylinder head valve damage.
Why An Engine Compression Test?
It's been my experience (over the years that I've been working on cars as an automotive technician), that a lot of the hard to diagnose misfire and/or no-starts that have come into the repair shop, where I work, have usually been caused by low compression or no compression.
So, not only will an engine compression test let you know the mechanical health of the cylinder head valves and piston rings, but (and I wasn't to emphasize) it'll also help you troubleshoot a tough to diagnose misfire condition or rough idle condition or a blown head gasket.
I've seen time and time again, that the vehicle has come into the shop with a misfire and everything was replaced and nothing seemed to solve it and it turned out that it was one cylinder with very low compression causing the problem.
The engine compression test is one of the most overlooked tests when diagnosing misfire codes (P0300, P0301, P0302, P0303, P0304), and it shouldn't be since it's an easy test to do.
Here are a few personal suggestions to help you nail down a hard to diagnose misfire (engine miss) and this is how an usually start troubleshooting the issue:
- I start by retrieving the diagnostic trouble codes with a scan tool.
- I next check for spark.
- It's important to eliminate the ignition system right of the bat.
- You can find an in-depth step-by-step tutorial on how to do that here: How To Test The Ignition Coil Pack (Chrysler 2.0L, 2.4L) (this info is found at: easyautodiagnostics.com).
- It's very important to check for broken spark plugs and/or spark plugs with carbon tracks.
- Here's a real life case study on carbon tracks and how they can cause a misfire: Carbon Tracks Are A Common Cause Of Ignition Misfires (at: easyautodiagnostics.com).
- Check that the fuel injector is being activated (Noid Light Test).
- This is a pretty simple test and it helps me make sure that the fuel injection computer is activating the fuel injector.
- The following Noid light article/tutorial may help you: How To Use A Noid Light And Where To Buy It (at: easyautodiagnostics.com -I know that this is not the most in-depth article on the subject, but it should give you an idea of what is involved..
- If I think I need to, I do a fuel injector resistance test.
- This test will tell me if the fuel injector has fried internally.
- You can find this test here: How To Test A Fuel Injector (Chrysler 2.0L, 2.4L).
- If all of the above tests pass with flying colors, I then check engine compression.
The above diagnostic method tests all of the possible problem areas that could cause a misfire. Try it! You can modify the tests as you see fit and to fit your personal misfire diagnostic dilemma. I think it'll help you!
Related Test Articles
You can find a complete list of tutorials in these 2 indexes:
The following articles are Chrysler 4 cylinder specific testing and troubleshooting articles:
- How To Test The Ignition Coil Pack (Chrysler 2.0L, 2.4L) (at: easyautodiagnostics.com).
- How To Test The Crank Sensor (Chrysler 2.0L, 2.4L).
- How To Test The Camshaft Position Sensor (Chrysler 2.0L, 2.4L).
- How To Test A Fuel Injector (Chrysler 2.0L, 2.4L).

If this info saved the day, buy me a beer!
