TEST 2: Testing The Fuel Injector's Resistance

Now that you've identified the ‘dead’ cylinder, the next step is to see if that cylinder's fuel injector has an internal resistance value that is drastically different from the other 3.
I'll explain: A fuel injector has a certain amount of internal resistance built/designed into it. When the fuel injector fails, this internal resistance changes.
By measuring the fuel injector's resistance and comparing it to the others, we can conclude that it's bad or not.
NOTE: All four fuel injectors on your Toyota are not gonna' have the exact same resistance value. This is normal because the variation in their resistances will be minimal. What IS NOT normal is when the resistance value of a fuel injector varies drastically compared to the others. The fuel injector with the drastically different resistance value is bad. Here's an example of this:
- Cyl #1 injector: 6.45 Ω
- Cyl #2 injector: 7.65 Ω
- Cyl #3 injector: 1.15 Ω < drastic difference indicates the injector is bad.
- Cyl #4 injector: 7.20 Ω
Second, to get the most accurate snapshot of the condition of the fuel injectors you're testing, the engine in your Toyota vehicle has to be warmed up. The key word here is warm. If the engine is hot (normal operating temperature), let it cool down for about an 45 minutes to an hour.
Alright, here are the steps:
- 1
Disconnect all four injectors from their electrical connectors. Although you may want to just test one fuel injector, I recommend testing all four of them on your Toyota.
- 2
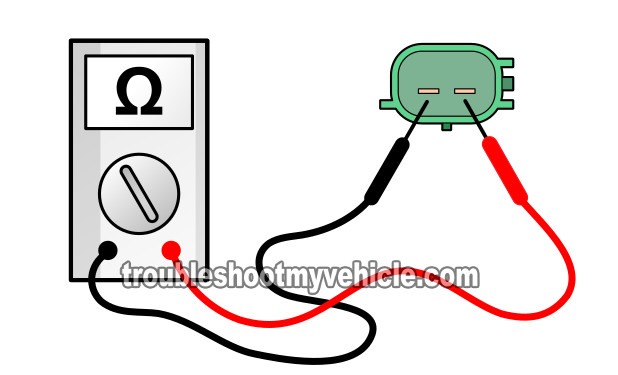
Turn on your multimeter and select Ohms mode and with the multimeter test leads, probe the male spade terminals of the first fuel injector you're gonna' test.
NOTE: It doesn't matter what color test lead you use to test either of the two fuel injector male spade terminals, the polarity of the leads is not important when testing the resistance (Ohms) of the fuel injectors. - 3
Write down this Ohms value down on a piece of paper after measuring the internal resistance of this first fuel injector. You'll be using this resistance value to compare it to the other three in a few moments.
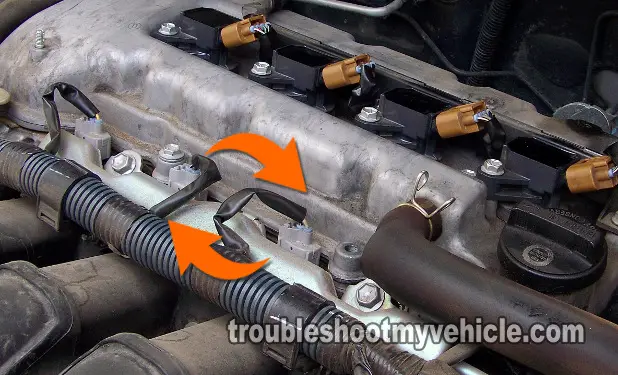
Don't forget to write down to what engine cylinder this fuel injector belongs to. You can use the image in the photo viewer as an aid in identifying the cylinders. - 4
Test the remaining fuel injectors and as before, write down their ohms value (that your multimeter registered).
Alright, with the resistance values of all fuel injectors on paper, let's interpret your results. Choose from one of the following CASES:
CASE 1: All of the multimeter resistance values are nearly identical. This result indicates that the fuel injectors are OK. So if your car is experiencing a rough idle condition or a misfire condition or misfire codes, the fuel injectors are not to blame.
Here's why: when you do find one bad fuel injector, this one will have a totally different Ohms (resistance) value. And this will confirm beyond any doubt that that fuel injector is bad.
Now, if your vehicle is till missing, take a look at the following section of this article:
CASE 2: One of the four multimeter resistance values is drastically different. This tells you that that particular fuel injector, on your Toyota, with the drastically different resistance value is bad.
I suggest that you retest that fuel injector one more time to make sure of the Ohms (resistance) value. If this value is still the same as before, the fuel injector is bad.
TEST 3: Swapping Fuel Injectors

Every now and then, you run into a situation where you have tested all four injectors and they passed the resistance test and you still think the fuel injector is behind the misfire (rough idle).
To finally eliminate the fuel injector as good or bad, the next step is to swap the fuel injector that belongs to the ‘dead’ cylinder with the one right next to it.
In other words, you're swapping the fuel injector of a cylinder you know is not misfiring with the one that is misfiring, if the misfire now moves to the cylinder that wasn't misfiring before, you now know beyond a shadow of a doubt that the fuel injector is bad.
IMPORTANT: Take all necessary safety precautions, since you'll be working around fuel in this test step. Gasoline is extremely flammable. Your safety is your responsibility. If you have never removed/replaced a fuel injector before, consult your Toyota's repair manual (no, not the owner's manual in the glove box!).
This is what you'll need to do:
- 1
Remove the fuel injector, of the cylinder that you found to be ‘dead’ when you did the manual cylinder balance test in TEST 1.
IMPORTANT: Consult a service repair manual for detailed instructions on how to remove and replace a fuel injector. - 2
Swap the fuel injector, with another. This other fuel injector has to come from a cylinder that you confirmed was not ‘dead’ in TEST 1.
- 3
Re-install the fuel injector rail as per instructions in a service repair manual.
- 4
Start the engine, after confirming you have no fuel leaks and that the fuel that spilled during the fuel injector swap has completely dried.
- 5
Perform the cylinder balance test per the instructions in TEST 1.
What you're looking for is to see if the misfire has now moved to the cylinder where you installed the fuel injector you suspect is bad.
Let's figure out what your test result means:
CASE 1: The misfire moved to where the fuel injector was swapped. This test result tells you that the fuel injector is bad and needs to be replaced.
CASE 2: The misfire DID NOT move to where the fuel injector was swapped. If the misfire stayed put in the same cylinder (even after swapping the fuel injector), then you now know that the fuel injector is good.
Since the cylinder is still misfiring, you now need to check that neither spark or compression is missing in that cylinder. The following tutorials will help you:
